Desktop spanning is used to combine several projectors to a single, logical Desktop area. After that, all applications behave as if just one monitor exists. This is the behavior the end-user will expect as system behavior after a calibration.
These are the typical topologies that desktop spanning can be set to:
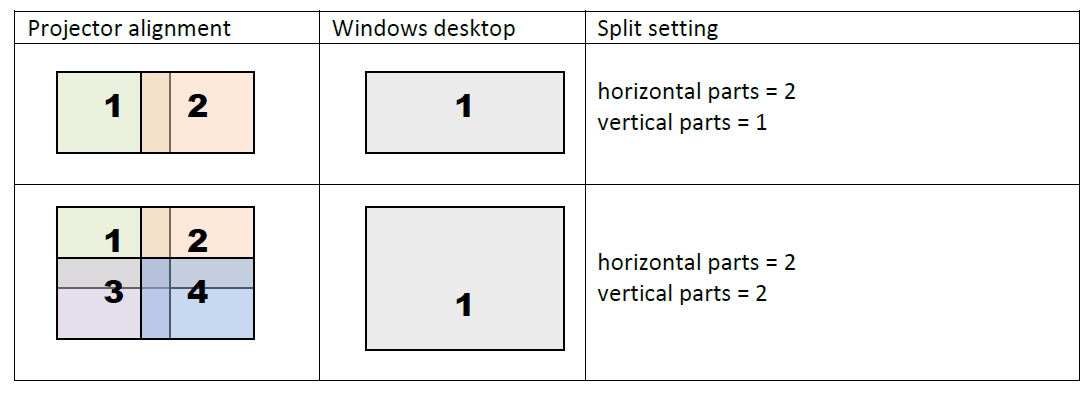
Table of Contents
NVIDIA Mosaic
Display spanning is an important feature supported by some graphic cards that allows you to unite multiple displays into one.
As soon as you use several projectors as a large, seamless desktop, having them shown as separate displays in Windows creates several issues. They won’t be synchronized and applications won’t perform as expected as they are not automatically expanded across the entire desktop.
Therefore, you must combine all projectors into a single local screen from the point of view of the system, so it recognizes one large screen instead of many smaller ones.
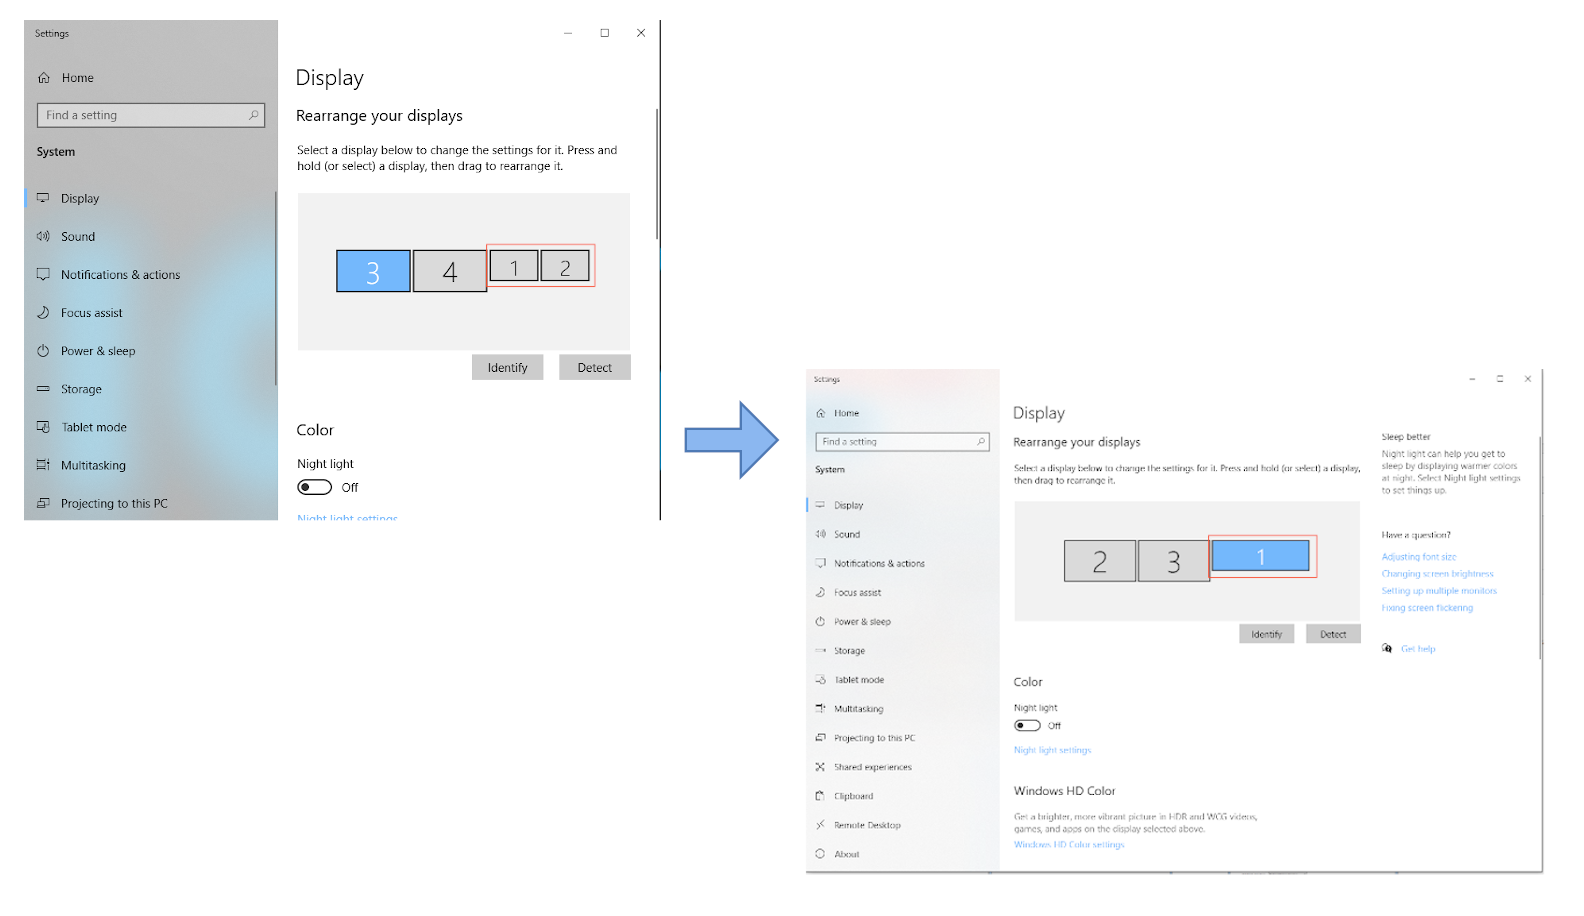
You can find the “Display settings” window by clicking right on your desktop and pressing “Display Settings”.
IMPORTANT: IF YOU ARE USING NVIDIA QUADRO HARDWARE, DISPLAY SPANNING IS REQUIRED FOR GPU HOOKING (ENABLES USAGE OF NVAPI).
Using display spanning enhances the behavior of third-party applications, which are supposed to be displayed in full screen on the multi-projection:
If the projectors are blended together but not spanned (viewed as separate displays by the system), the application, when maximized, will go on full-screen mode in only one projector.
(a) Without display spanning- The projectors are blended but are still recognized by the system as a separate display, so the application is only shown in one projector.
(b) With display spanning- Maximized as whole spanned display. Showing the result in ONE large screen – application should work “as expected”.
Display spanning for NVIDIA Quadro
Video tutorial explaining NVIDIA Mosaic
Step by step guide
Follow these steps to create a Mosaic, if you are using NVIDIA Quadro graphics card:
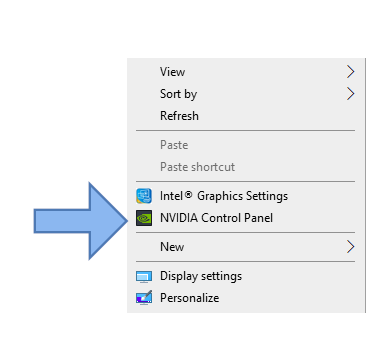
Step 1- Open NVIDIA Control Panel (right click on your desktop).
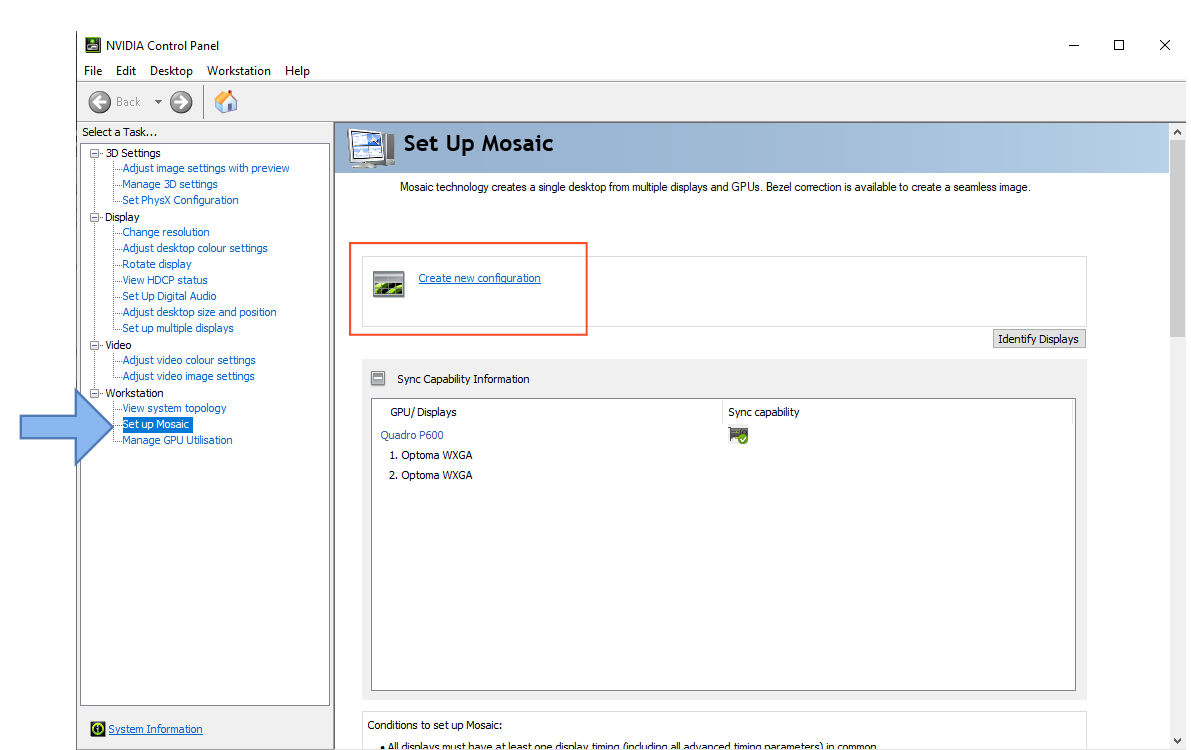
Step 2- Select “Set up Mosaic” tab and click ‘Create new configuration’ in order to start the NVIDIA Mosaic set up.
Step 3– Select the correct configuration for your setup.
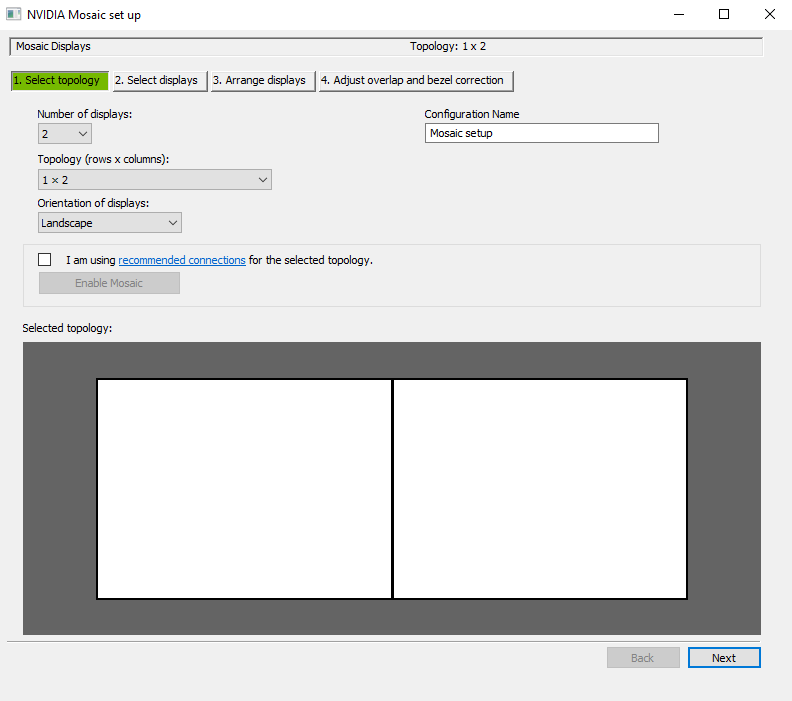
- Number of displays- Select the number of displays (projectors).
- Topology- Select the arrangement of your displays.
-
Orientation of displays- Landscape (horizontally), Portrait (vertically), Landscape (flipped), or Portrait (flipped).
! IMPORTANT! Some nvidia drivers cause trouble when using portrait mode. in this case use landscape and flip afterwards. - Configuration name- Name your configuration.
- I am using the recommended configurations for the selected topology (check box).
- Selected topology- Preview of the selected topology.
Click ‘Next’.
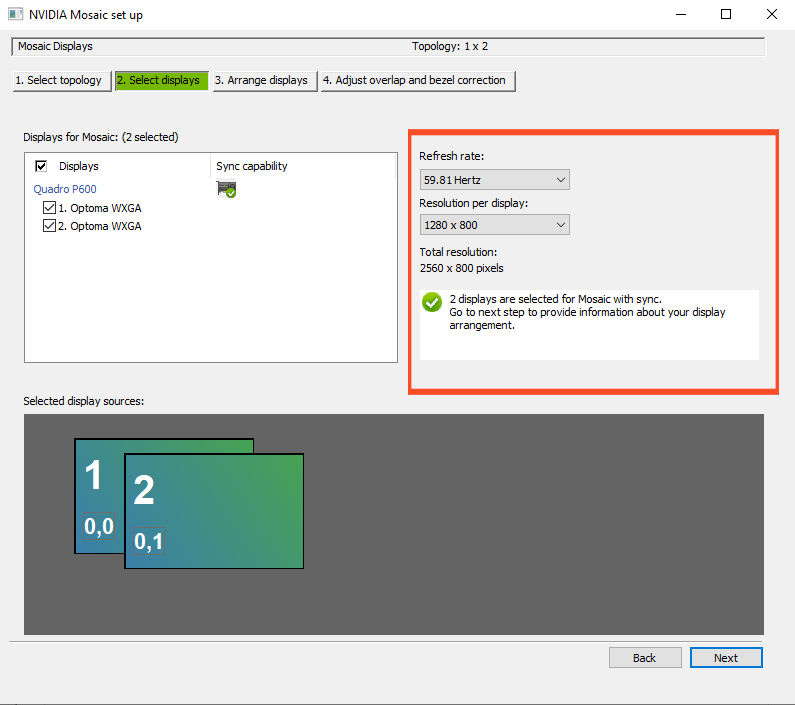
On the “Select displays” tab, if everything has been done correctly the information window will have a green check sign with the following instructions or troubleshooting messages.
You will also see the information about refresh rate and the resolution of the displays.
Click ‘Next’.
Step 4- Arrange displays according to their topology by drag’n’drop or typing the numbers into display slots ( you will see the numbers in the projectors or click right on your desktop and go into the “Display settings” and click “Identify displays”).


Click ‘Apply’.
Step 5- Click ‘Finish’ to finalize the procedure.
The projectors and any screens you have connected will flicker, as their configuration is being re-arranged.
Confirm that the operation went well in the confirmation dialog.
Your computer will ask you to confirm if you would like to keep the new mosaic set up. Click “YES” (you have 15 seconds to do this). If you don’t manage to click it within that time, the system will go back to its previous settings.
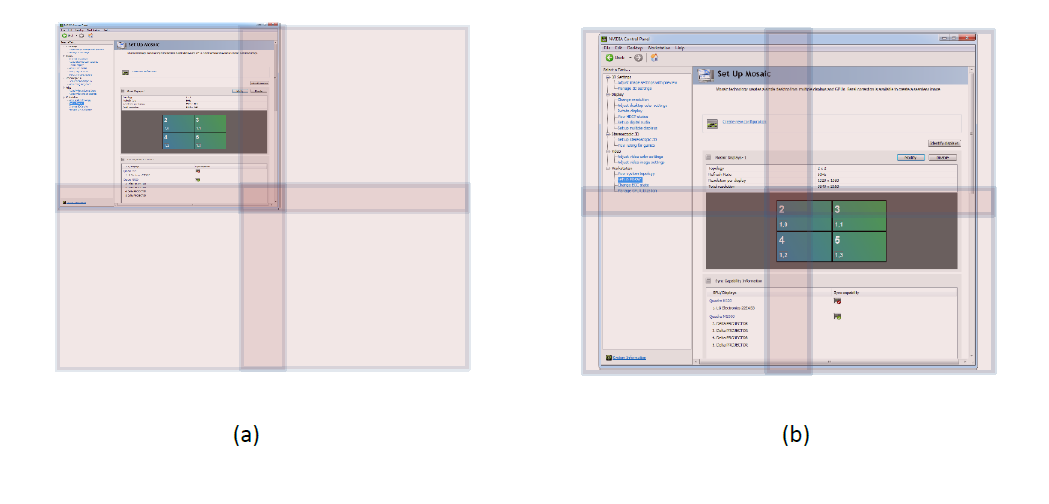
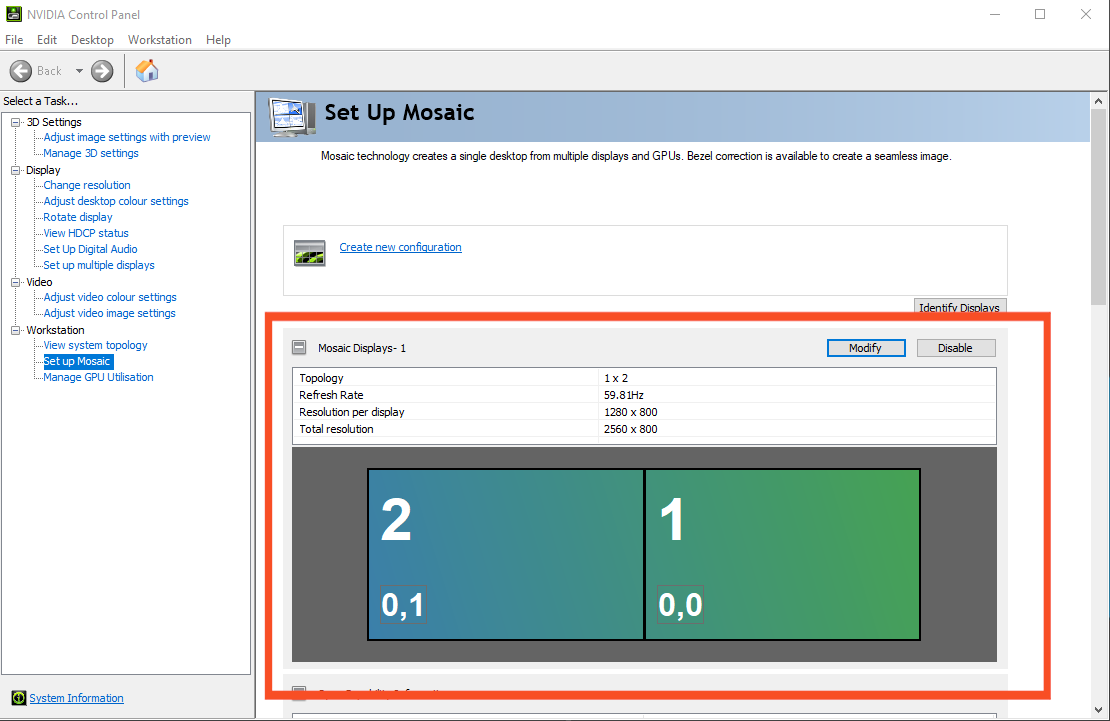
A successful MOSAIC setting for the above shown display setup looks like this:
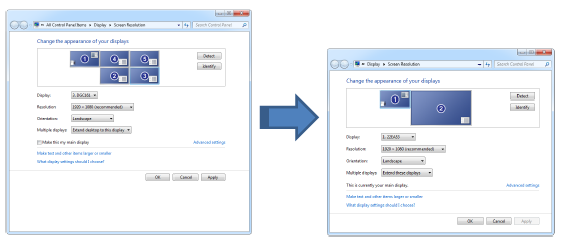
Step 6- Check the result in “Screen resolution” dialog.
Step 7- REBOOT!
There are several resources that explain how to create a Mosaic setup:
NVIDIA Surround (GeForce)
The feature for this is provided by NVIDIA GeForce graphics cards as “Surround”. It is provided by the NVIDIA Control panel.
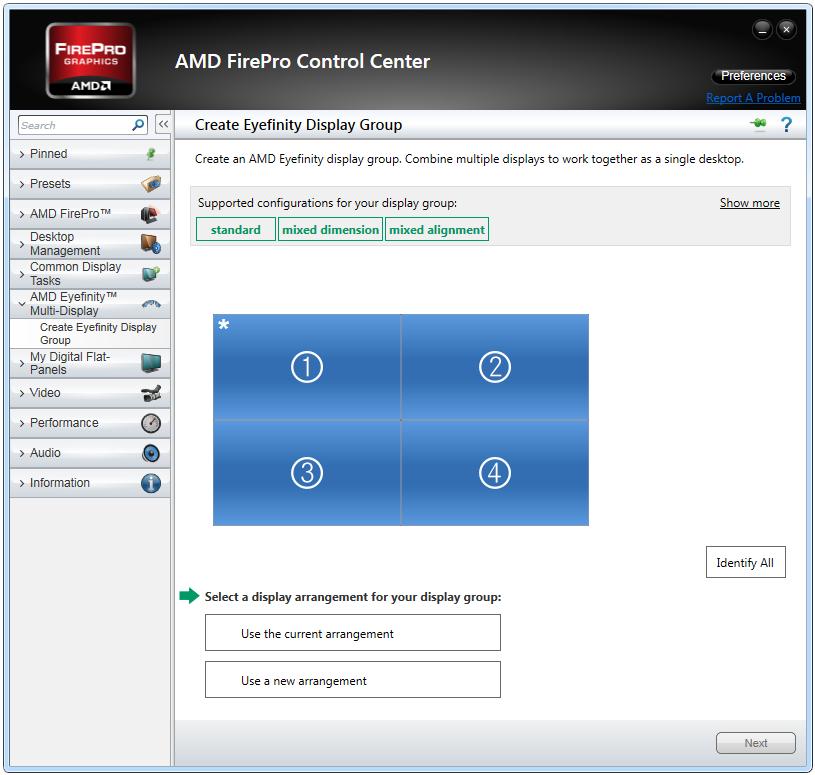
AMD Eyefinity
The feature for this is provided by AMD on all graphics card as “Eyefinity”. It is provided by the AMD Control panel. The Eyefinity setting for the display setup shown above looks like this: