
Table of Contents
Dataton Watchout 6 – Export

it is possible to export the calibration to then use it in Watchout if you are using an open-OS server as you need to install VIOSO 6 on all machines.
If the free mode is used, the export settings must be made manually. In project mode, a preset can be selected when creating a new project.
Presets for Watchout 6 and Watchout 7 already exist for this Watchout uses the MPCDI format to apply the calibration information.
Watchout 6 uses MPCDI V1, Watchout 7 uses MPCDI V2
VIOSO 6 – Freemode preparation for Watchout 6
The freemode is prepared as usual, a possible split has to be set up, the projector outputs used have to be selected, a camera has to be selected, the mode of operation has to be selected and further parameters can be adjusted.
learn more about freemode preparation
as soon as the calibration is started, the calibration process is identical to the projectmode
VIOSO 6 – Project Mode preparation for Watchout 6
learn more about the project mode configuration
In order to be able to use the result of a calibration in Watchout, it is necessary to set the export accordingly.
If you choose the Watchout Preset, the most things are preset accordingly to the needs of watchout.

The following is important for the export:
- Watchout 6 is only able to use MPCDI V1 files.
- You need to export a virtual content rectangle. Thats the complete screen as result of the calibration. Otherwise Watchout will create an infinite sized screen that will crash the Software.
- Another big role is played by the number of columns and rows used to create the MPCDI file.
Simple screens can be created with a quarter of the resolution; if the surface becomes more complex, the values have to be corrected upwards.
The resolution represents the maximum value, more rows and columns are technically not better, or a value that is too high can impair the performance of the media server. - Another challenge is the MPCDI format in the edges. Since the measurement results tend to fray at the edges, it helps to make the warp a little larger and to mask the edges. The masks are then also exported and displayed correctly.
Once the MPCDI file is created, it can be imported into Watchout. A corresponding screen is created in Watchout and the warps, blends and masks for the screen are saved.
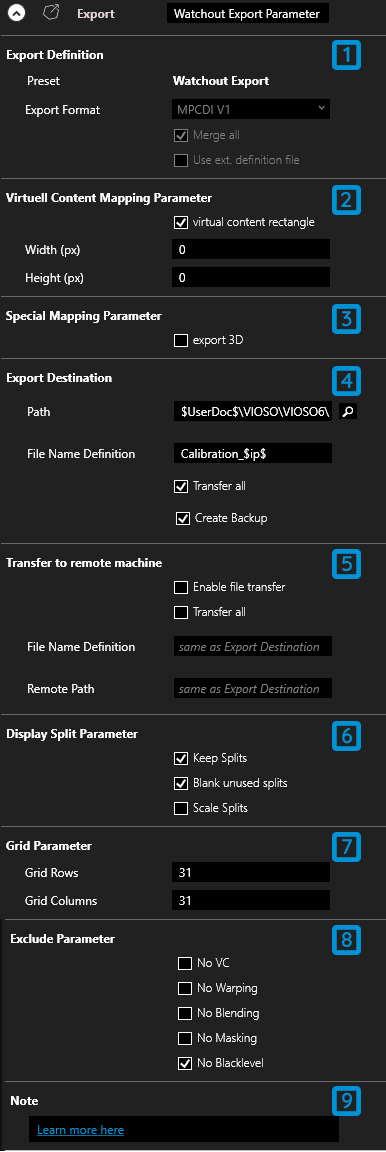
Export Configuration
The export parameters can be adjusted in the Designer by selecting the export node:
-
Export Definition
The preset for watchout is set
No changes can be made -
Virtual Content Mapping Parameter
Virtual content rectangle – is the outline of your calibrationresult. If cheched it’s exported as needed in Watchout.
Width and Hight – Here you can enter the resolution of the content you are expecting. If you leave 0 – 0 the calibrated Pixelspace will be used. -
Special Mapping Parameter
Checkbox – exports in case the used 3D model -
Export Destination
Path – Enter an individual export path
File Name Definition – Enter an individual file name
Transfer all – Transfers all files to export destination
create Backup – creates a Backup of the export in the VIOSO folder -
Transfer to remote machine
Ability to transfer the calibration automatically to clients if needed -
Display Split Parameter
Keep Splits – should be unchecked if you use a Mosaik setup -
Grid Parameter
Rows and Columns – The Mesh thats used to create the MPCDI file -
Exclude Parameter
check to exclude parameters from export -
Note
Link to the Helpdeskpage
Calibration (same for free mode and projectmode)
Calibrate the Screen as needed
lern more about the calibration process
edit the result to your satisfaction
learn more about editing the calibration
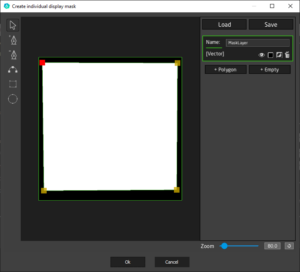
Masking
When exporting MPCDI files, the edges may be jagged. In order to master this phenomenon, you should always warp a little larger. A few pixels are enough. If you now set output masks at the edge, these are exported separately and then displayed correctly.
Export
export the calibration as set in the designer or use the following values
imperative values for Watchout are
- MPCDIv1
- check virtual “content rectangle”
- change the ammount of columns and rows to get a good result
Watchout 6 MPCDI import – step by step
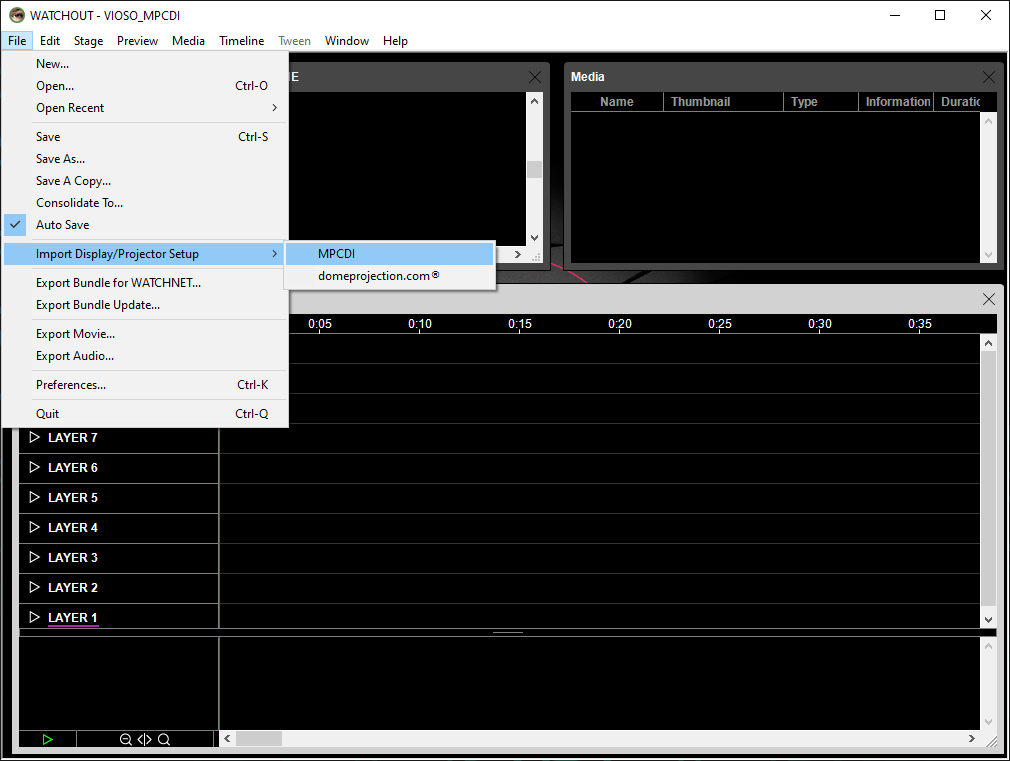
Open your show or create a new show
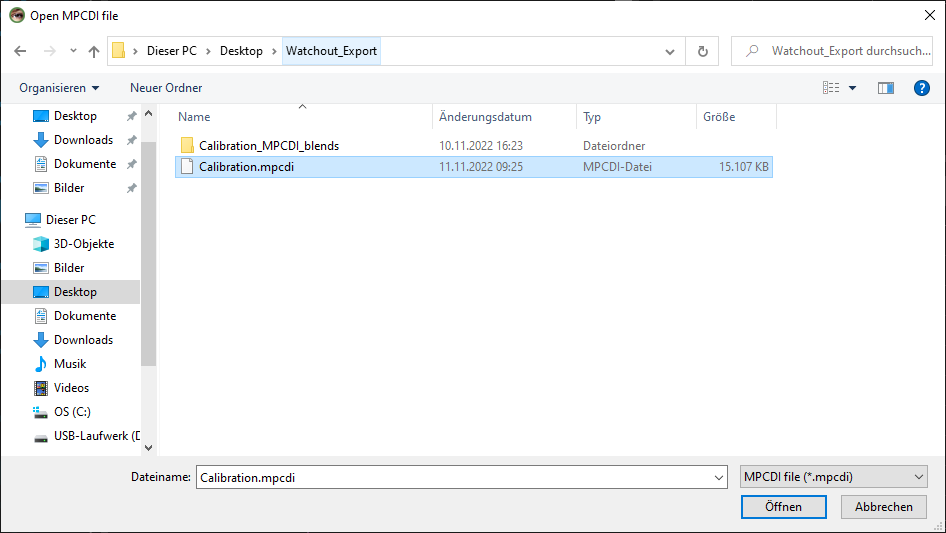
Import a MPCDI File using the Filemenue
Choose a File, a tier to import to and an offset. The offset is needed if you use more than one screen in your project.
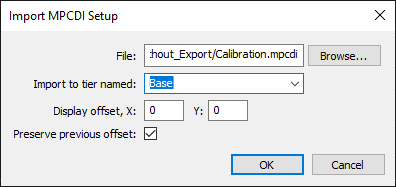
Only MPCDI files of version 1 are accepted
The Stage shows the imported Screen. The blends and masks are imported to the media area

Enter the IP adress and outputchannel and the correct resolution of the Output. If you want to use more than one screen, enter the stage position to your needs, to prevent an overlap of different screens.
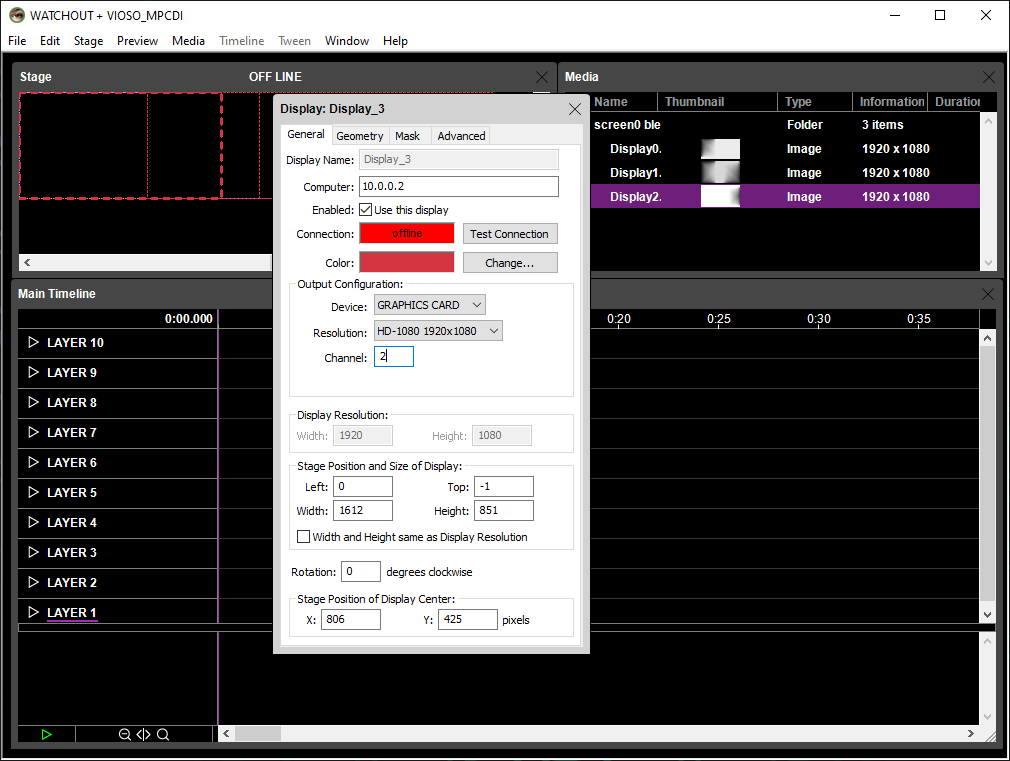
Now the screen is prepared and ready for content placement.
for further informations about MPCDI click the link below:
MPCDI (Multiple Projection Common Data Interchange) – What is MPCDI? (dataton.com)
Watchout 7 MPCDI import – step by step
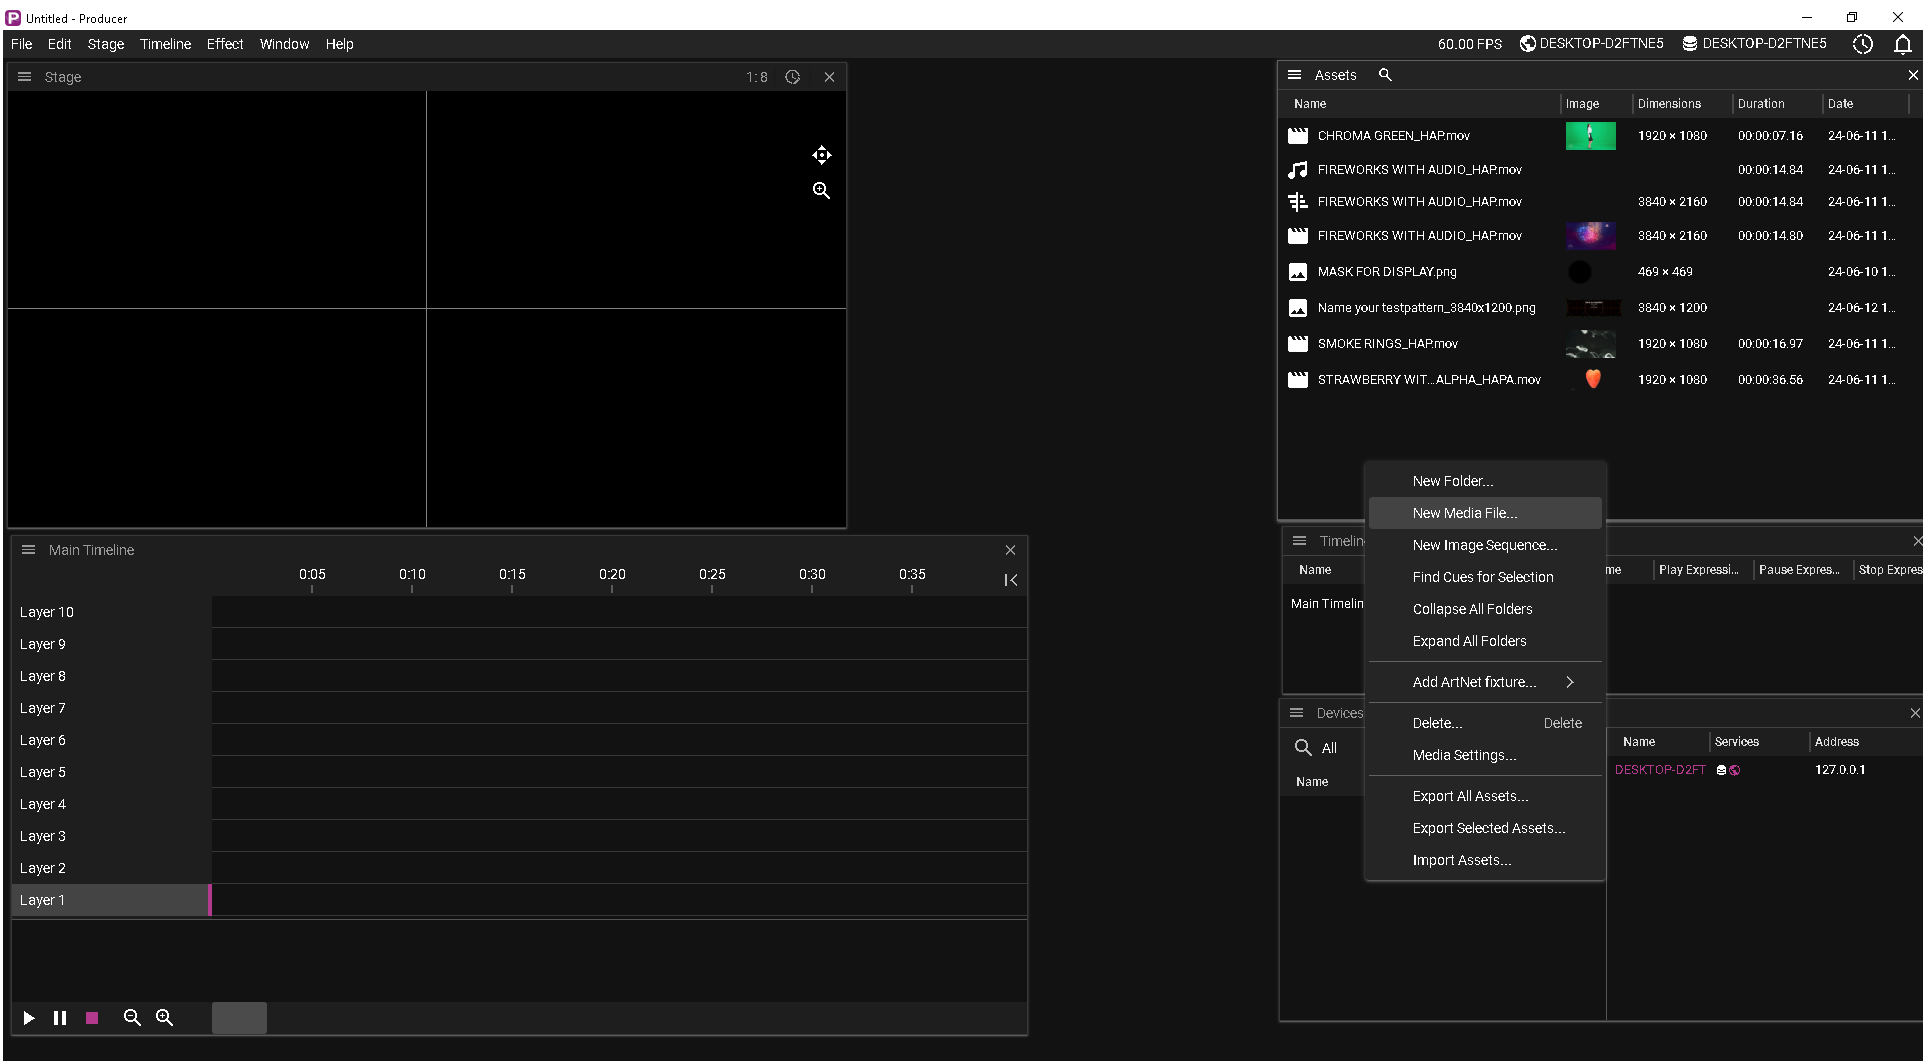
Open your show or create a new show, right click in the assets and choose “New media file”
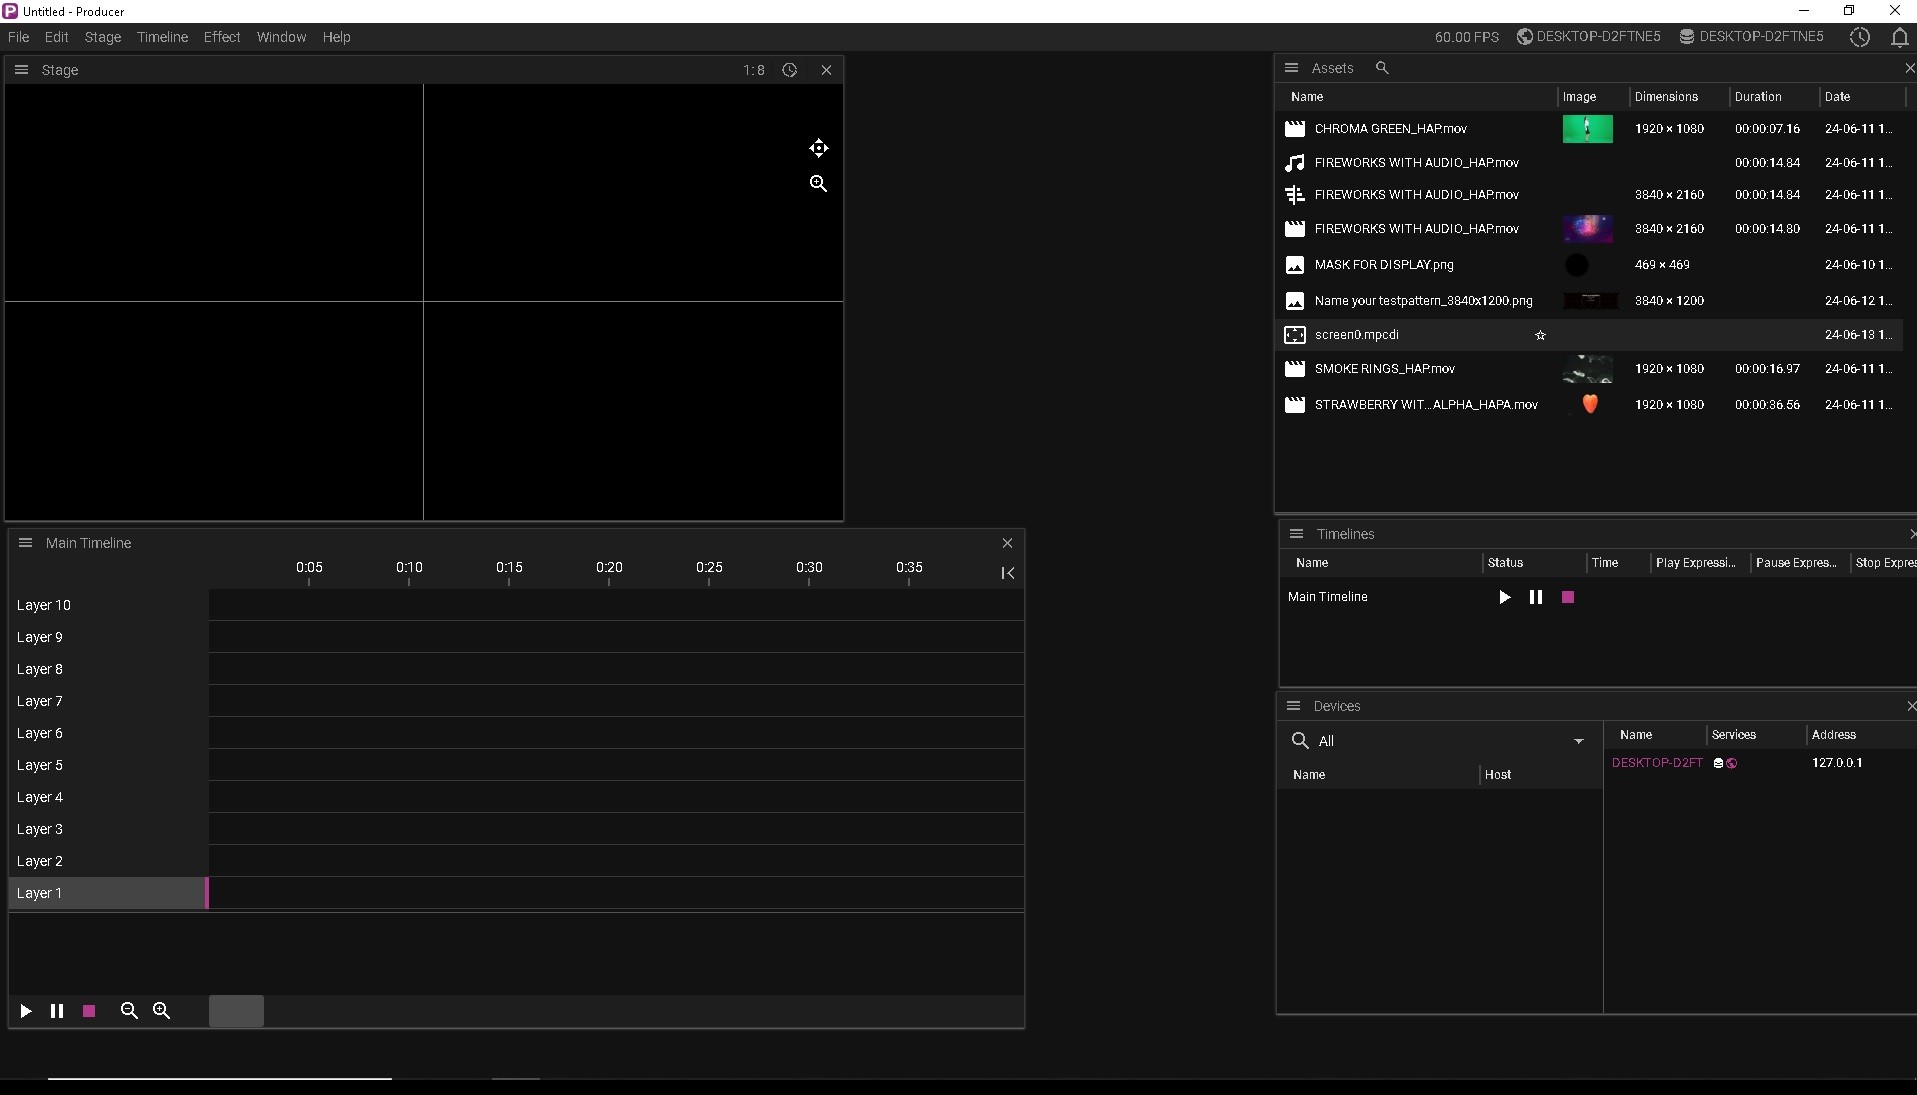
Load your MPCDI2 data

Drag n drop the MPCDI file shown in assets onto the stage
Enter the IP of the screen created
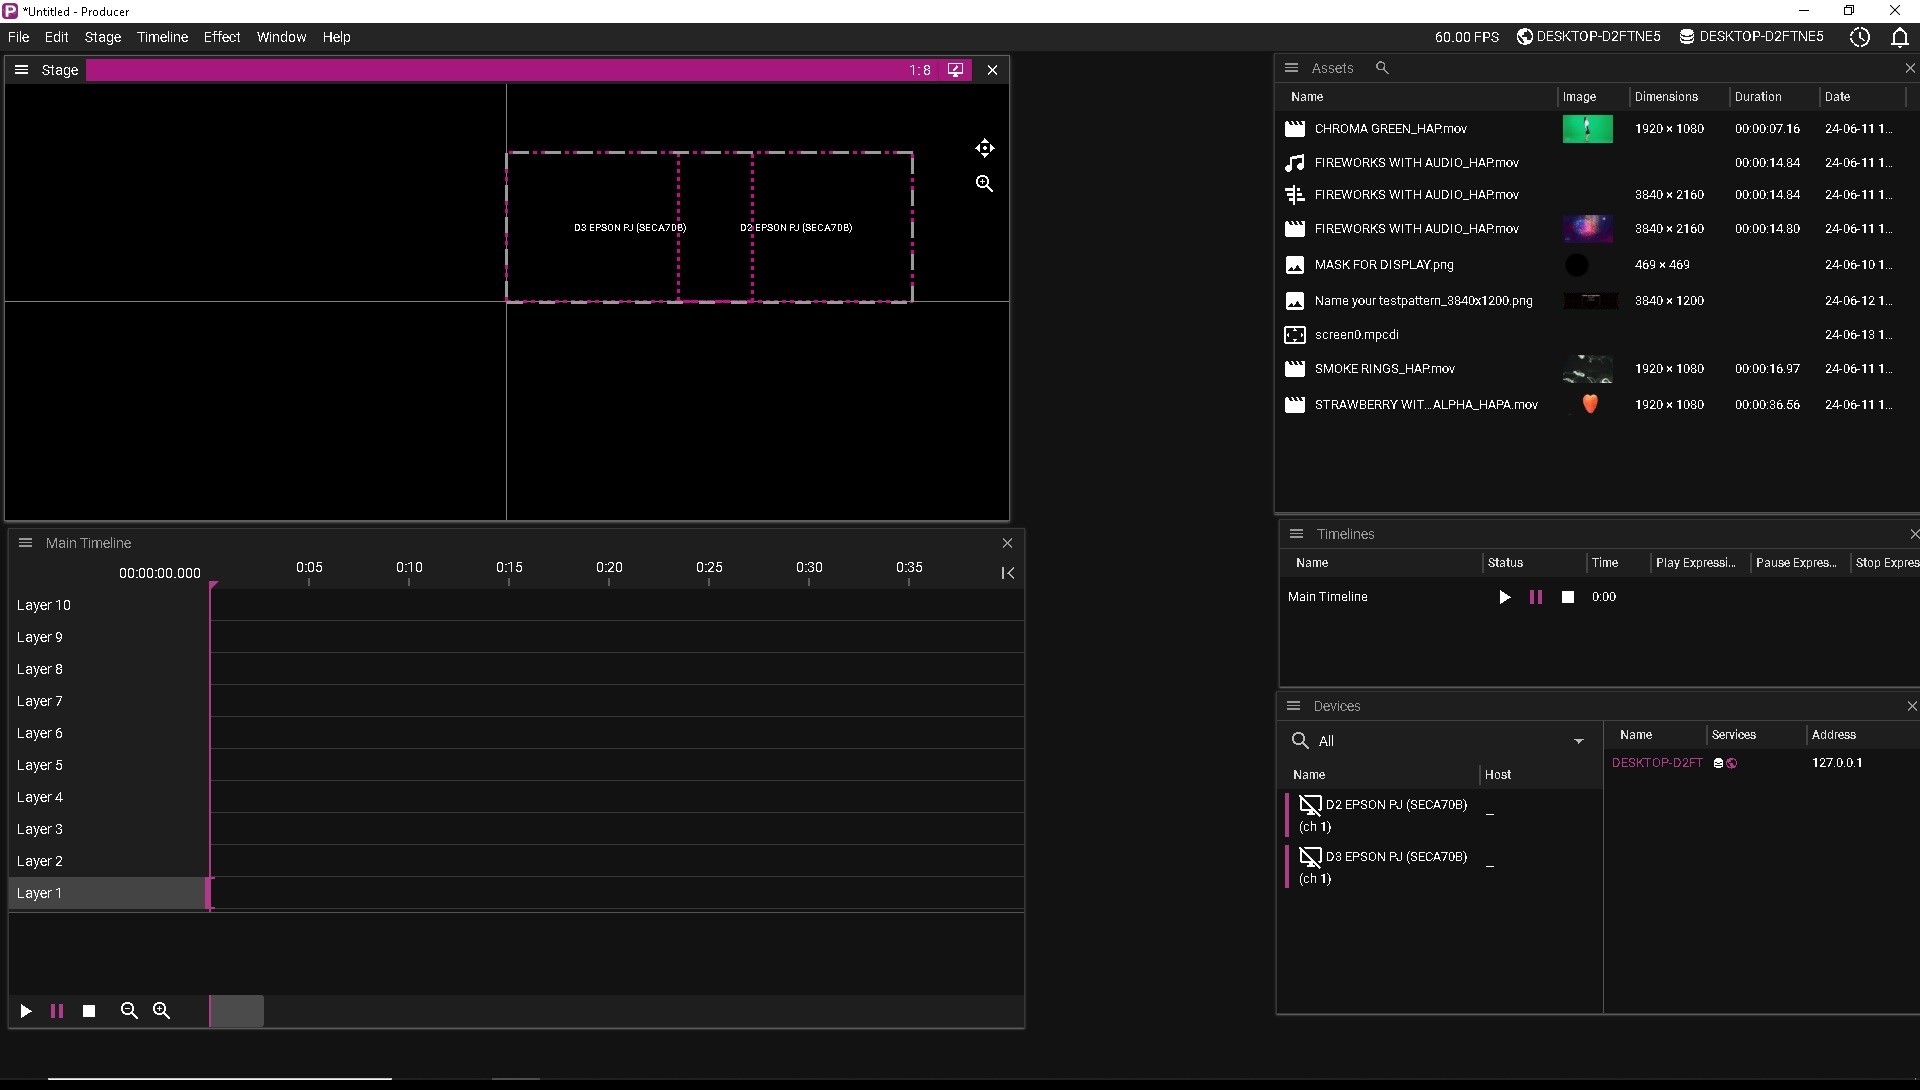
Your are good to play content
