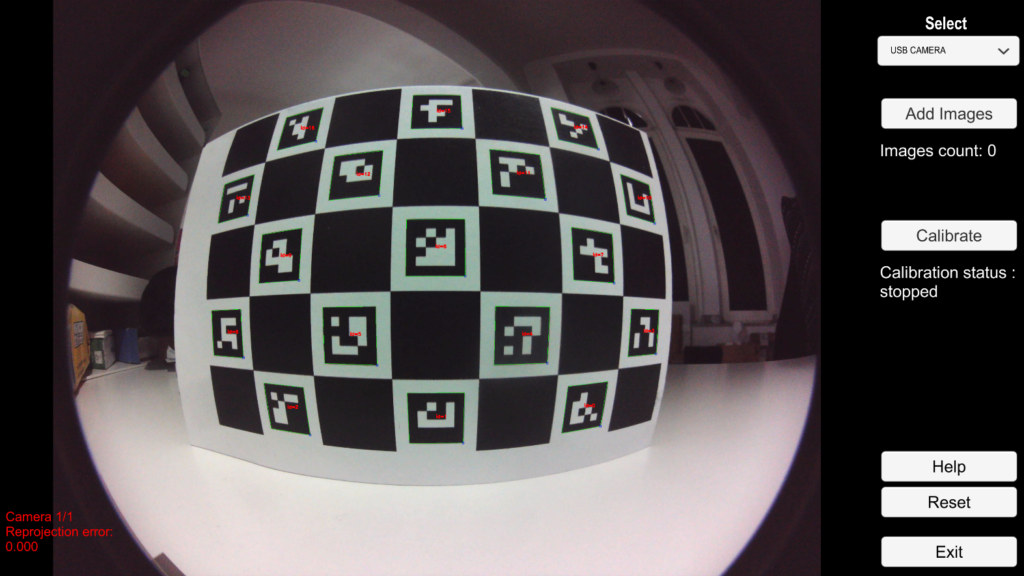
Every camera image has a distortion compared to an ideal flat image, which comes from the optical design of the lens and camera body. Such distortions can be measured and taken into account when doing computer vision calculations based on camera data. This set of data is called “camera intrinsics“.
Since intrinsics are specific to each (camera + lens + focal length) combination, you will need to a perform a calibration for each camera sensor used.
The advantage of this procedure is providing a more accurate geometric result, and saving time warping the distortions manually, especially for wide angle lenses and multi-camera setups.
Note: Do not mix this with “projector calibration” which is the main purpose of VIOSO’s products providing an automatic warp and blend solution.
For creating camera intrinsics, we present a workflow based on the ArUco detection tools in two options:
- Tool I is command line based (valid for all cameras)
- Tool II is based on an interactive Unity interface (DirectShow cameras only)
Table of Contents
Tool I: Aurco Command Line Application (all cameras)
- Print the aruco_calibration_grid_board_a4.pdf included in the downloadable folder above.
- Record a video file in the .avi format and run the following command:
- From a command line run:
aruco_calibration.exe Aruco_test.avi camera_calibration.yml -size 0.08 - The last parameter is the size of the Aruco squares in meters.
- Press S to start the video. Press A to add images to calibration set. The calibration utility will auto quit and create the calibration file when the video finishes.
Press esc if finished early to export tocamera_calibration.yml
Tool II: Aruco Unity Application (directShow cameras only)

Steps
The tool enables you to perform a calibration with a live video feed from selected cameras.
Please follow the instructions below for detailed steps:
- Print the Aruco Board provided in the program folder (ArucoBoard.png), Size: 30×42 (A3 Format). Stick it on a hard cardboard: the paper must remain as flat as possible during the calibration
- Place the camera on a stable mount, select it in the drop menu (“Select Camera”) and make sure it is in focus. Focus mode should be Manual and not Automatic.
- Hold the board in front of the camera until all markers are detected, then click on the “Add Image” Button, or press the “A” Key.
- Take at least 10 images of your calibration board in different positions and orientations without moving the camera between each snapshot. See examples below:

- Click the “Calibrate” button to generate the calibration parameters from your image list.
Result
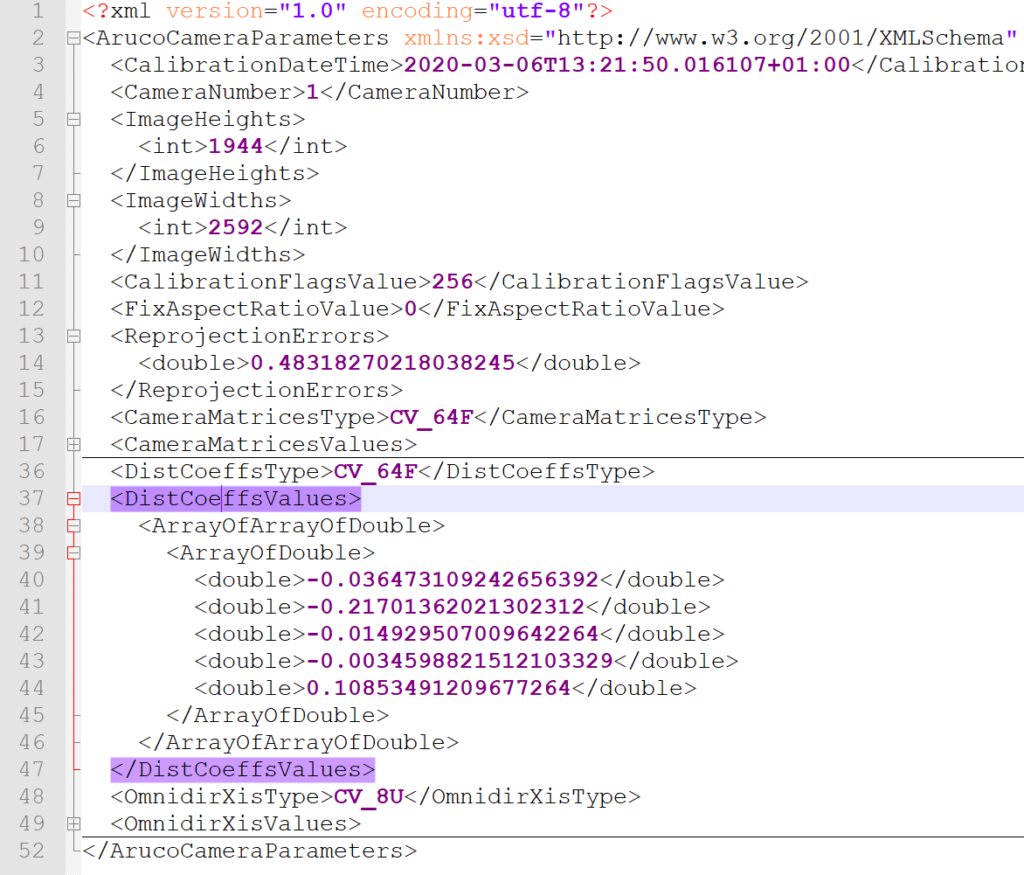
Once the calibration is finished, a folder will pop up containing the camera parameters file. It consists of an XML document in the format shown below:

To import to VIOSO you will need to extract the Camera Matrix and Distortion coefficients values into the .yml file template below. The file can then be uploaded in VIOSO software (see the last section “Usage in VIOSO”)
%YAML:1.0
---
image_width: 640
image_height: 480
camera_matrix: !!opencv-matrix
rows: 3
cols: 3
dt: f
data: [ 2.55198608e+02, 0., 3.23092438e+02, 0., 2.53572128e+02,
2.73426575e+02, 0., 0., 1. ]
distortion_coefficients: !!opencv-matrix
rows: 1
cols: 5
dt: f
data: [ -3.67070436e-01, 1.28284067e-01, 1.49923563e-03,
-4.72627202e-04, -1.94898471e-02 ]
Usage in VIOSO
Importing Intrinsics
To import the .yml intrinsic file, navigate to the menu Calibration > Intrinsics and Postions
Select task: Import Device Parameters , select the corresponding camera, click next and navigate to the file path.
Using Intrinsics during the calibration
In the VIOSO projector calibration procedure, stop at the “Adjust camera” step, there you can activate from the dropdown the instrinsic calibration.
Important: Make sure you have the correct resolution that matches your intrinsics!

Notes
- The reprojection error is displayed to score the calibration precision: it should be as close to 0 px as possible.
- Make sure you use good lighting conditions during the calibration process. Avoid reflections and lens flare.
References
- OPENCV:
- ArucoUnity:
- Calibration Tips: