Table of Contents
1. Concept
In certain setups, where the calibration camera might need to be moved away or disconnected completely from the system (ex. center of a planetarium that needs to be clear) automatic re-calibration using a center mounted camera is not possible.

In this case, we can use multiple cameras in a 2-step approach which allows us to replace the main calibration camera scan (First Calibration) with secondary multi-cam scans merged together to fulfill the same result (Recalibration). We refer to this technique as AnyMulticam.
| Pros | Cons |
|
|
|
|
|
2. Workflow
1. Preparation [e.g uEye Cameras]
-
- Install the master camera in a way that it’s able to solely calibrate the whole screen
- Install the client cameras and adjust their views to cover portions of the screen according to the multi-camera standard rules.
- Camera Driver setup: Choose a custom installation and make sure “uEye Direct show Service” is unchecked and not installed.
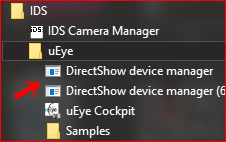
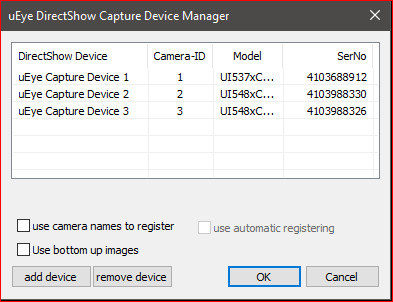
This prevents the cameras from being rearranged randomly after reboot. - Assign different IDs/names to the cameras using the uEye DirectShow device manager found under All programs\IDS\uEye:


- Give administrator rights (write/read) to the SPcalibrator folder. You can find it by right clicking the VIOSO software icon and choosing “open file location”.
2. VIOSO Calibration
- Calibrate the system using the master camera and save it.
(!) Create a backup of the calibration file as it will be overwritten by the client calibrations. - Multi-cam calibration: at this step the Master camera can be disconnected.
-
- Start the calibration from the view of the first client camera. Keep in mind the multi-camera standard rules making sure that no projectors is shared or seen partially by the camera.
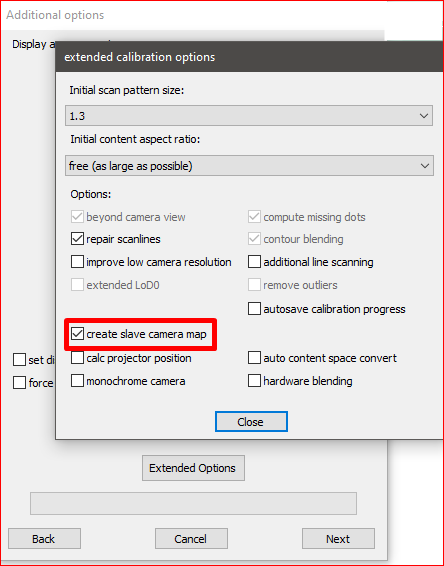
- In the Additional options step, open the “Extended Options” and check the “create slave camera map”.

- Continue the calibration process. After its finished a
".map"file will be generated under [VIOSO default path]\Calibration -
Repeat steps (i, iii, iii) for each camera until you’ve scanned all projectors.
(!) Make sure brightness settings / IRIS / Timing..etc on cameras are similar and that the detected brightness of the projectors during calibration results in a similar value as well. - Close the VIOSO application.
-
- Recalibration using the generated maps:
-
- Start a new VIOSO project.
- Calibrate the multiple camera views the same way as in (2.) but without checking the “create slave camera maps” option. The maps generated previously will be used automatically.
You will notice that the result of the calibration for each view corresponds the master camera perspective (ex. fisheye). - Save the calibration, and create a backup file. The backup will be used for scripting re-calibrations.
- To merge the scans into one click on “Calibrate” select all projectors marked with the * then choose the method “Preceeding Calibration”
- Save this result in a separate file (ex. final.sps)
-
3. Notes
- While calibrating the slave cameras in map creation mode (registration) you will notice that blending is not calculated.
- To reset the system and de-register the camera maps, you need to delete the “.map” files from \Calibration