The EDID emulation feature is supported by some professional series of graphic cards: NVIDIA Quadro (with the R256 driver and newer) and AMD FirePro. When an EDID is loaded or forced through the management system, the driver ignores display hot-plug actions.
Managing the display information using a customizable EDID manager by a professional GPU adds a great deal of stability and reliability to an AV system.
PLEASE NOTE: EDID MANAGEMENT IS NOT AVAILABLE ON NVIDIA GEFORCE GRAPHICS CARDS!
Video tutorial:
Watch the video tutorial covering how to setup fixed EDIDs:
Step by step guide:
If you are using NVIDIA Quadro video cards, follow these steps:
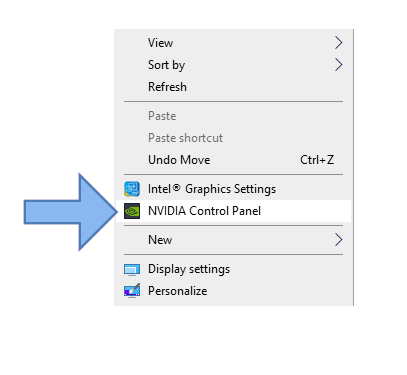
Step 1- Right click on your desktop and click ‘NVIDIA Control Panel’.
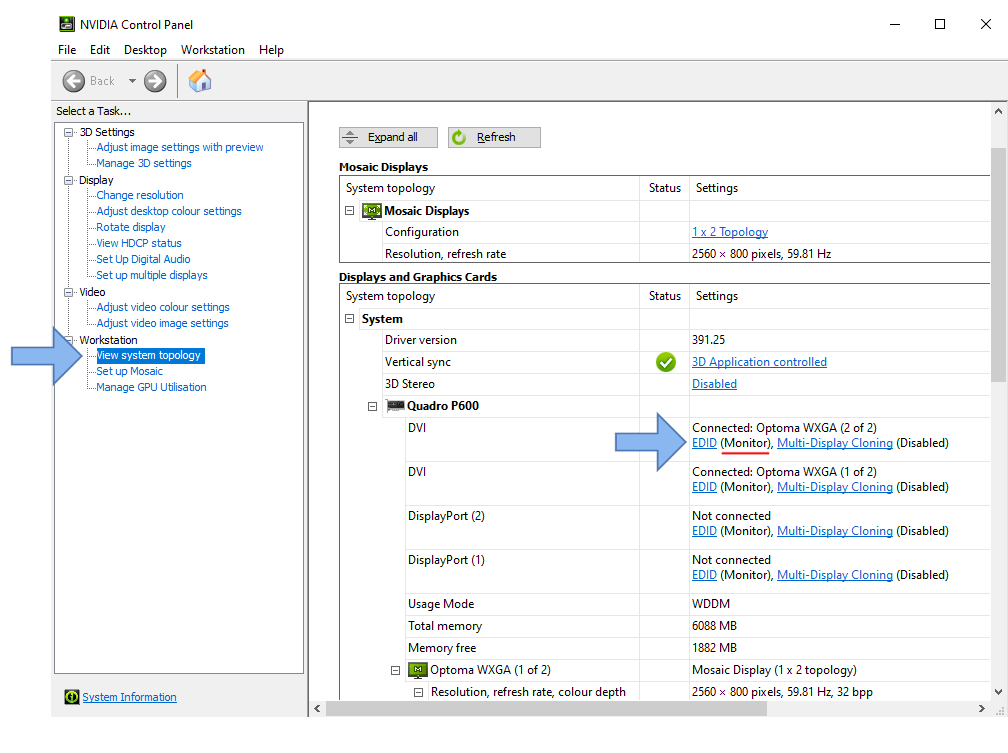
 Step 2- Click on “View System Topology” and locate the display you want to modify and export EDID data. Click on ‘EDID’ (it should be marked as “Monitor”).
Step 3- On the “EDID management window”, select the “Export” tab. Export the EDID data from the selected projector and save it onto the disk as a file.
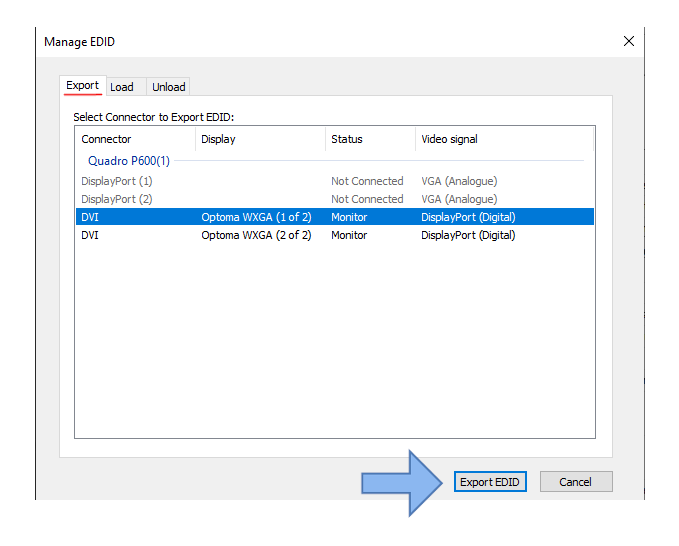
If all of the projectors are the same (same type of projector and brand), it is enough to export and save the EDID from one of them. This file can be used for all of the projectors of the same model. Name the file according to the projector name and model for future purposes.
Step 4-
- Select “Load” tab.
- Click ‘Browse’ to select the file.
- Checkbox the outputs you want to load your EDID data.
- Press ‘Load EDID’.
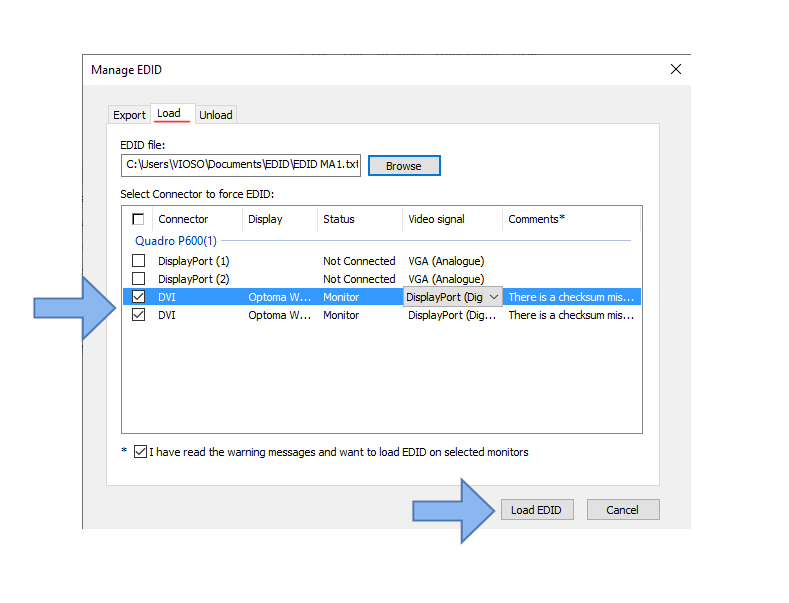
After you have successfully loaded the EDID, where it previously said “monitor” will now read “file”. 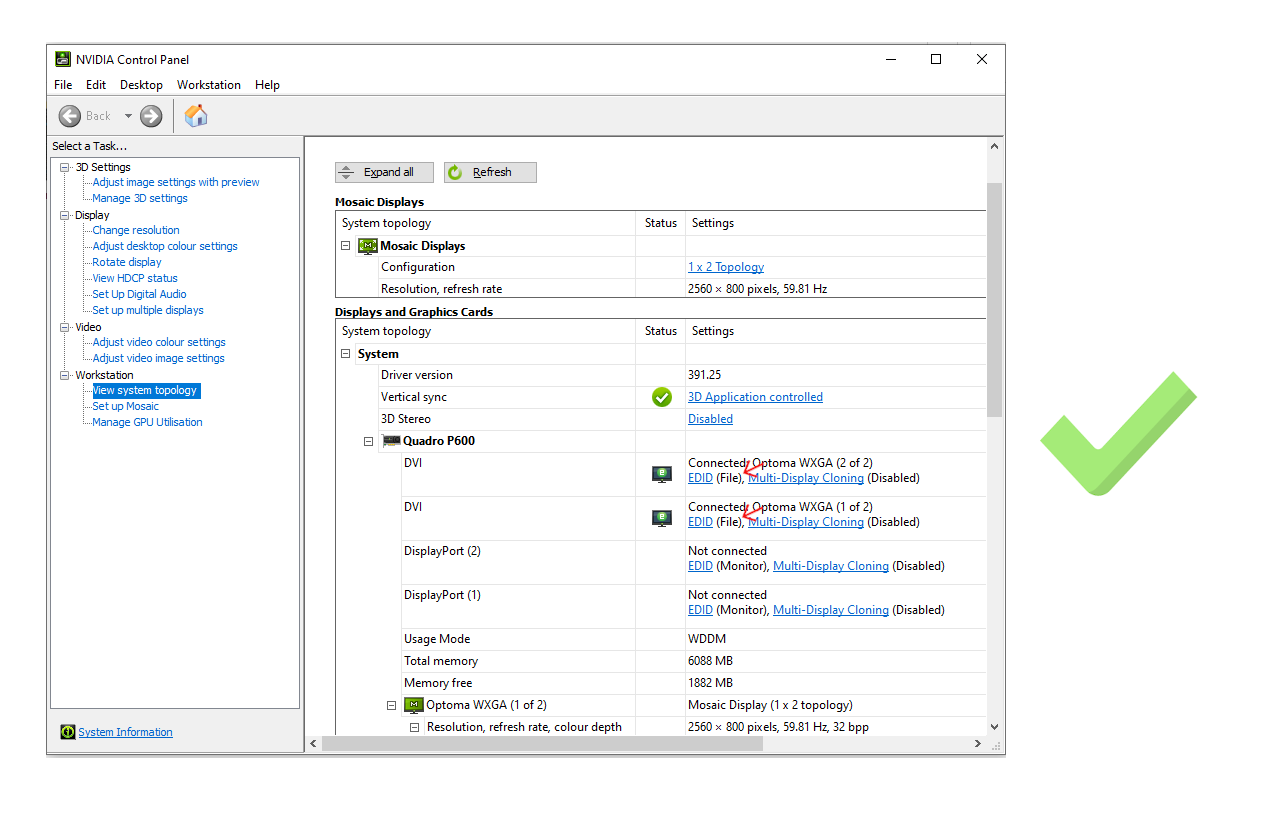
Step 5- REBOOT!
Please do a reboot before doing anything else on this system.