
Table of Contents
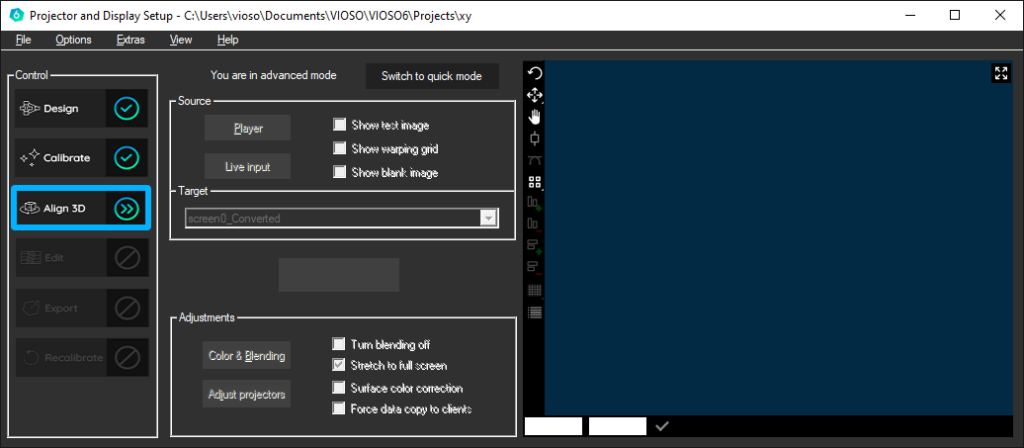
Align 3D
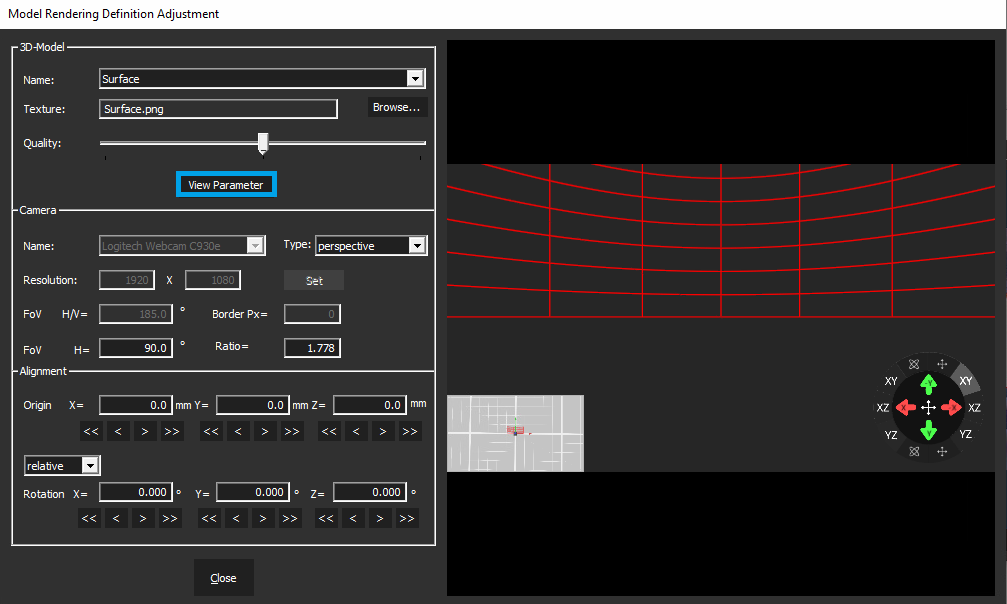
This step appears in projectmode when a 3D model is selected in the designer at surface.
Here the measured image is mapped to the 3D object and set in relation to the camera.
The goal is to place the created UV map exactly on the object. Any inaccuracies can be improved afterwards in the “Edit” step.
The position and viewing direction of the camera are crucial for the image to fit the object.
Changes are displayed on the screen in real time
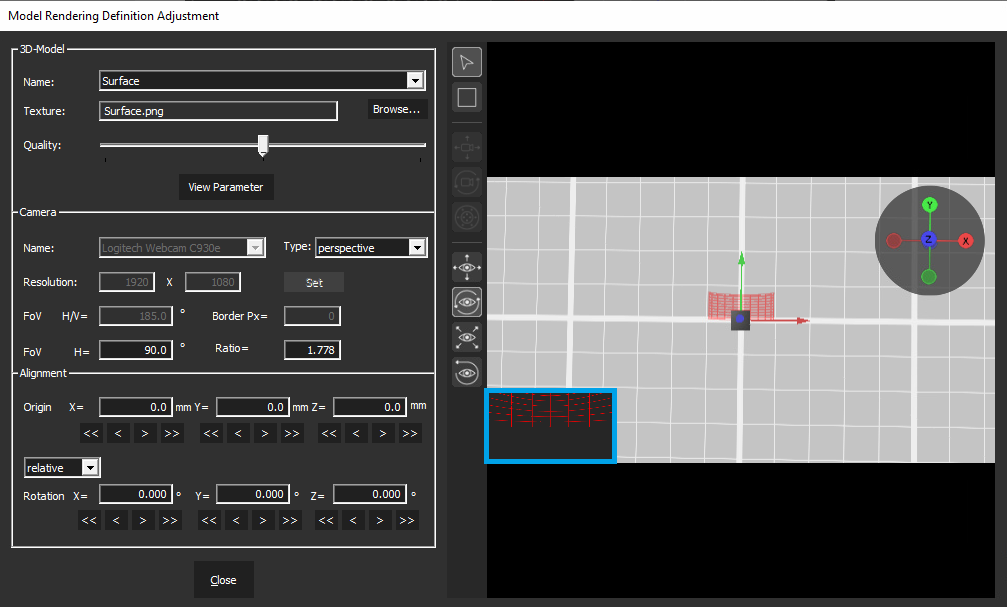
Camera positioning in the 3D World
The task is to match the virtual position of the camera with the real position
The Output of the Servers are showing what the camera is capturing in the align 3D Tab. Therefor its recommended to turn the camera that way, that the 3D Object is in sight of the Camera. The exact distance and position in space must be determined. The values can be entered manually or can be found out by moving the camera.
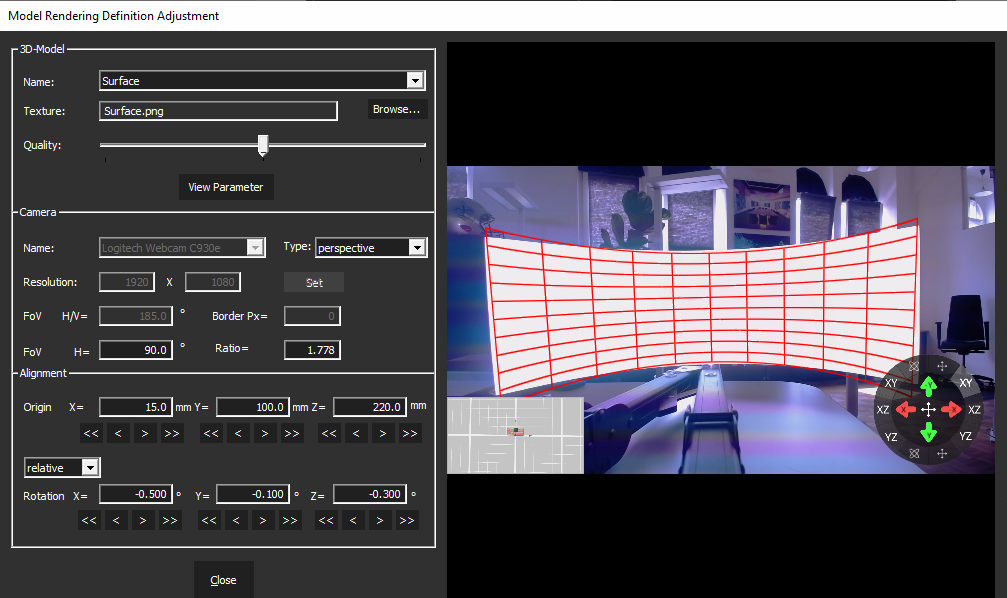
If the FoV is set correctly and the Position of the Camera is as it is in reality, the resulting Output should already fit quite good.
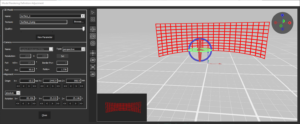
When the camera is pointing to the screen, the mesh appears in the cameraview and on the output:
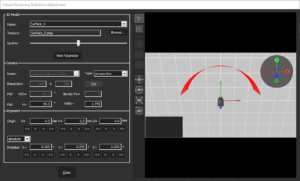
Adjustment from World-View
It is possible to make the settings in the world view. Here the world view is displayed in the main window. The camera and the screen are displayed in relation to each other. Whether the position in the software roughly corresponds to reality can be checked quickly in this way.
The other view is displayed in the lower left window, where you can also switch between the views.

Change View
The PiP window shows the other view, either the 3D or world view or the virtual image of the camera. By clicking on this area on the lower left, you switch between camera and spectator view. In the Cameraview, you will only see the Model, if the camera is in the direction of the Model.
Adjustment from Camera-View
It is possible to make the settings in the Camera view. Here the camera view is displayed in the main window. If you compare the real camera image, you get a good result.
The other view is displayed in the lower left window, where you can also switch between the views.
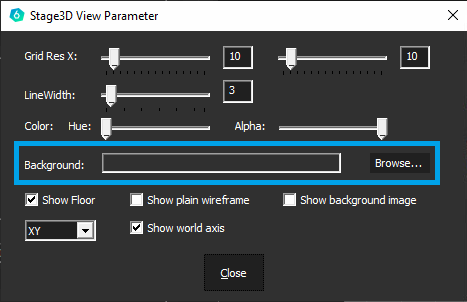
It is aslo possible to add a screenshot from the camera as a background to help on positionning your 3D model.
You will find a screenshot of the camera done at the beginning of the calibration in the Project folder under “Content” (shortcut to open work directory is CTRL+O)

Tools
| Select tool |  |
| Fine grid |  |
| Move camera on axis |  |
| Rotate camera |  |
| Show navigation gizmo |  |
| Pan |  |
| Rotate view |  |
| Zoom view |  |
| Reset view |  |
The view gizmo allows us to move and rotate the view on screen.

use the mouse to rotate the view
The camera gizmo is shown if you click the gizmobutton in the Worldview, and per default in cameraview
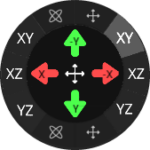
this gizmo allows you to move the camera
On the left are the axes for controlling rotation, on the right are the axes for movement.
By selecting the axes, the arrows change the corresponding values.
The axes are also displayed in the arrows.
After the positioning of the camera and a result that’s nearly matching you will have the possibility to tweak the Output in the Edid Tab.