Edge Blending and Projector color matching
See a video explaining the blending parameters:
A calibration can be edited in three ways:
- Blending and Color of all projectors (“Display Compound”).
- Individual Color balance of singular projectors.
- Warping.
To edit a calibration, either continue immediately after a calibration procedure is finished or load an existing calibration from disk.
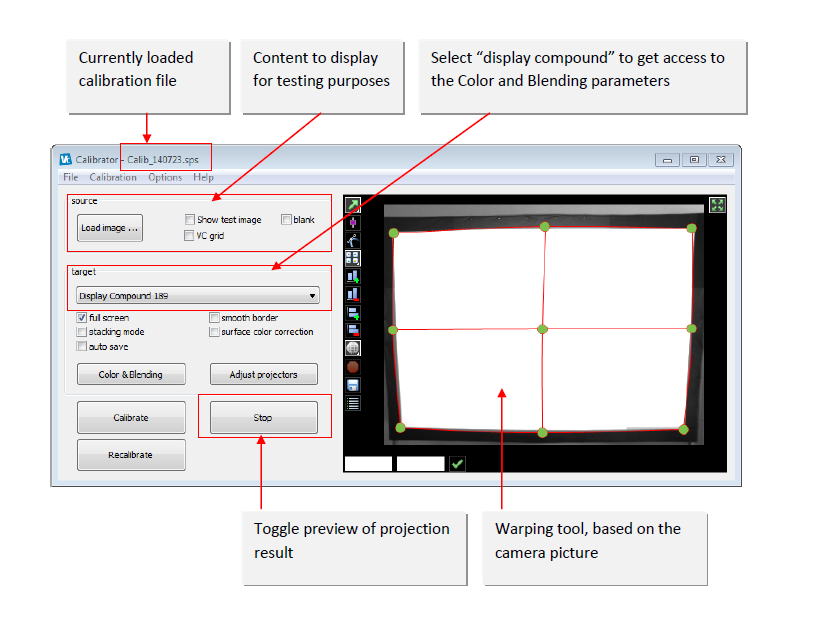
This is the appearance of the user interface when a calibration is active or loaded:

Editing an existing Calibration–Adjust Blending and Color (all projectors)
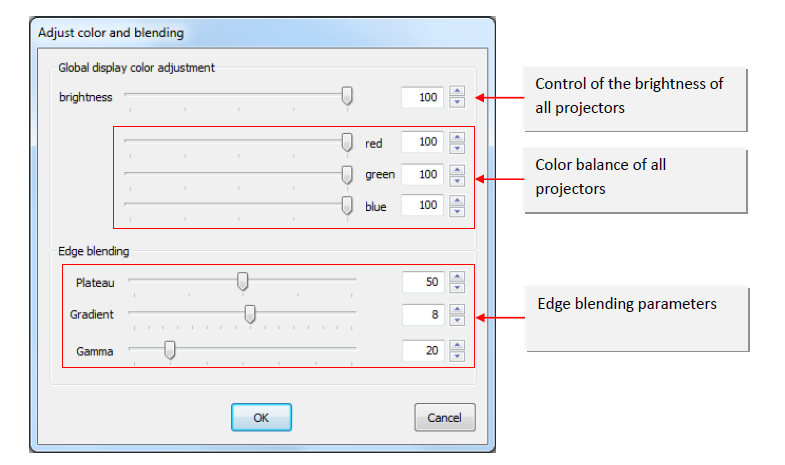
The color balance, as well as the blending parameters, can be edited after a multi-projector calibration has been finished and the “display compound” is selected as “target”.

The color balance and overall brightness parameters affect all projectors that are connected by a display compound.
The edge blending parameters affect blend edges of all projectors. Though the parameters of the blending are automatically optimized during the calibration procedure, you may want to adjust these parameters to create the best blending experience based on the current content:
- Plateau- Increasing or decreasing the intensity in the blending zone.
- Gradient- The size of the blending gradient applied to each overlapping edge.
- Gamma- The brightness of the overlapping area.
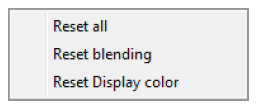
Right-click menu on the dialog:

Right-clicking the mouse on the opened dialog provides options to reset recently done actions and revert to the state when the dialog was initially opened.
Individual Color balance of singular projectors
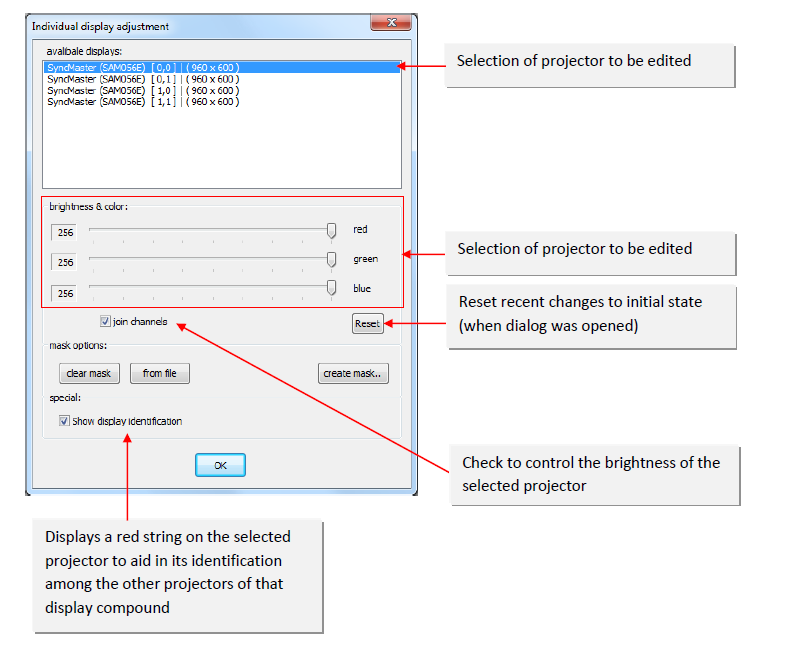
Each projector within a display compound can be edited in its brightness and color balance. This is useful to match the visual differences of projectors according to a seamless color representation.

Use the color sliders individually or check the box “join channels” to change the projectors intensity and color balance. Use this to increase the quality of the blending.