Table of Contents
New calibration
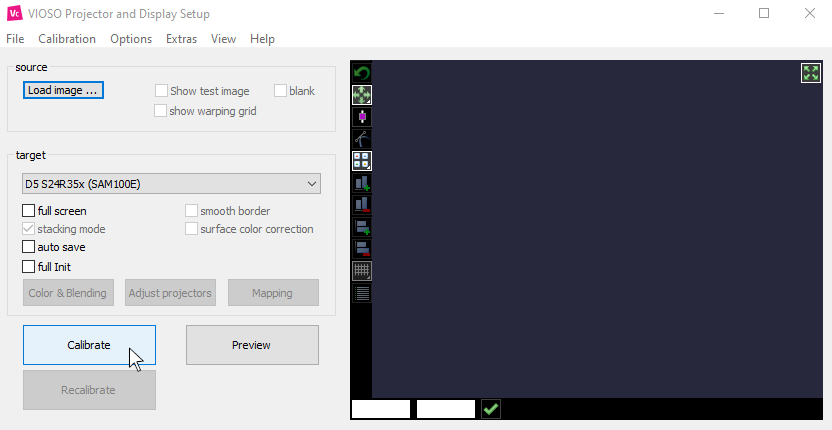
Once you open the VIOSO Core software, click the ‘Calibrate’ button on the main program window to create a new calibration.
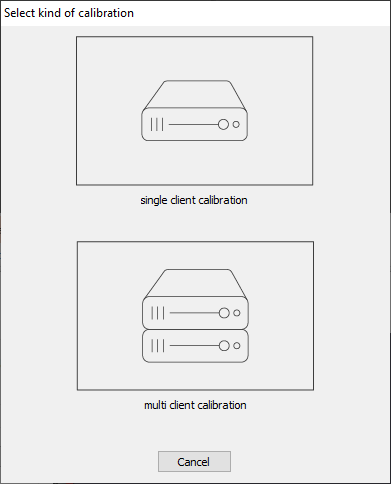
Select the kind of calibration
If you are using one workstation or PC, choose ‘Single client calibration’.
If you are working with multiple workstations or PC’s, that is a multi-client calibration and we will review the process in another section.*
The Select display(s) and camera dialog will come up.
Display selection
Choose the displays you want to be your outputs (projectors)–choose as many projectors as you want to calibrate on this setup. Once you have selected the projectors, by clicking on their name it will turn blue, marking the selected projectors.
In this section you will see any output connected to your PC or workstation and any screen you have connected to your system will appear on this list.
Display arrangement
Select the screen or surface type you are working with.
The following calibration modes represent different mathematical models for scanning and calibration. Thus, it is quite important to select the correct one.
Their names state the configuration they are dedicated for:
 |
Flat screen (fast scanning)
Camera-based method for flat screens and slightly curved screens (Examples: projection screens, solid flat walls, ceiling, or floors). |
 |
Curved screen (fast scanning)
Camera-based method for any kind of curved screens, spherical screens, and domes (Examples: Planetariums, event domes, cylindrical panoramas, 360 panoramas, truncated domes, semi spheres, etc.). |
 |
Any surface (detailed scanning)
Camera-based method for any kind of uneven and complex surface. This requires a very clear image of the testing patterns filmed by the camera. Scanning will take a long time and is intended for experienced users (Examples: rock surfaces, uneven walls or buildings, textured and uneven surfaces). |
 |
Manual setup
The calibration will be done manually without the help of the camera. |
 |
Preceding calibration
Uses the parameters of a previous calibration. |
Camera selection
Select the camera that you want to use for this calibration scan. If you don’t see the camera you would like to use, make sure your camera is connected.
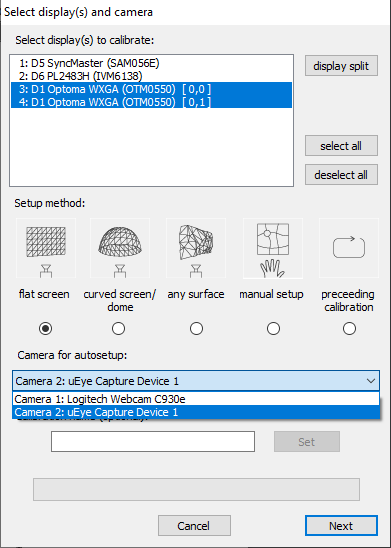
Set a name for your calibration (optional).
Click ‘Next‘.
Display arrangement window
Choose the arrangement your projectors are set up in:
- Grid/arbitrary- The Projectors are in a non-linear or random set up.
- Horizontal strip- Projectors are set up in a horizontal line.
- Vertical strip- Projectors are set up in a vertical fashion.
When in doubt, always choose “Grid/Arbitrary”.
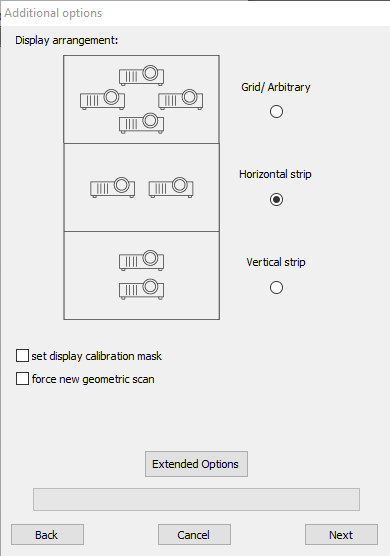
Under the display selection you will find the following check boxes:
- Set display calibration mask (check box)- If checked, you can create a projection mask in the beginning stages of the calibration. This feature may be helpful during the scan if there is a lot overshooting.
- Force new geometric scan (check box)- If checked, the system will perform a new scan of all projectors without showing the “Select geometric correction data source for display between projectors”.
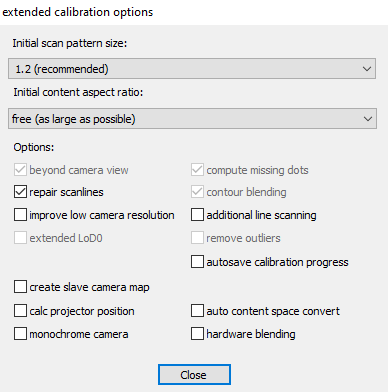
- Extended options- Open the extended calibration options window.
Click ‘Next’.