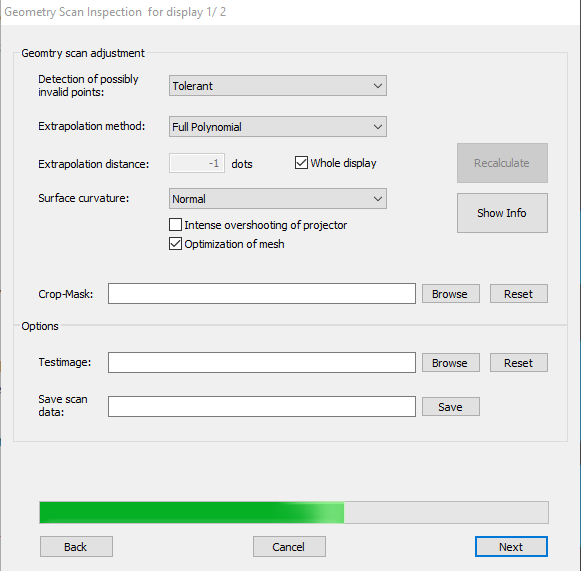
After the scan process for a projector is completed, the “Geometric scan Inspection” window will pop up.
See here how to handle the results:
If you are satisfied with the result on the projection surface with the current settings, click ‘Next’.

To know more about the features of the geometric scan inspection, go to the geometry scan adjustments section.
Final result inspection for this scan
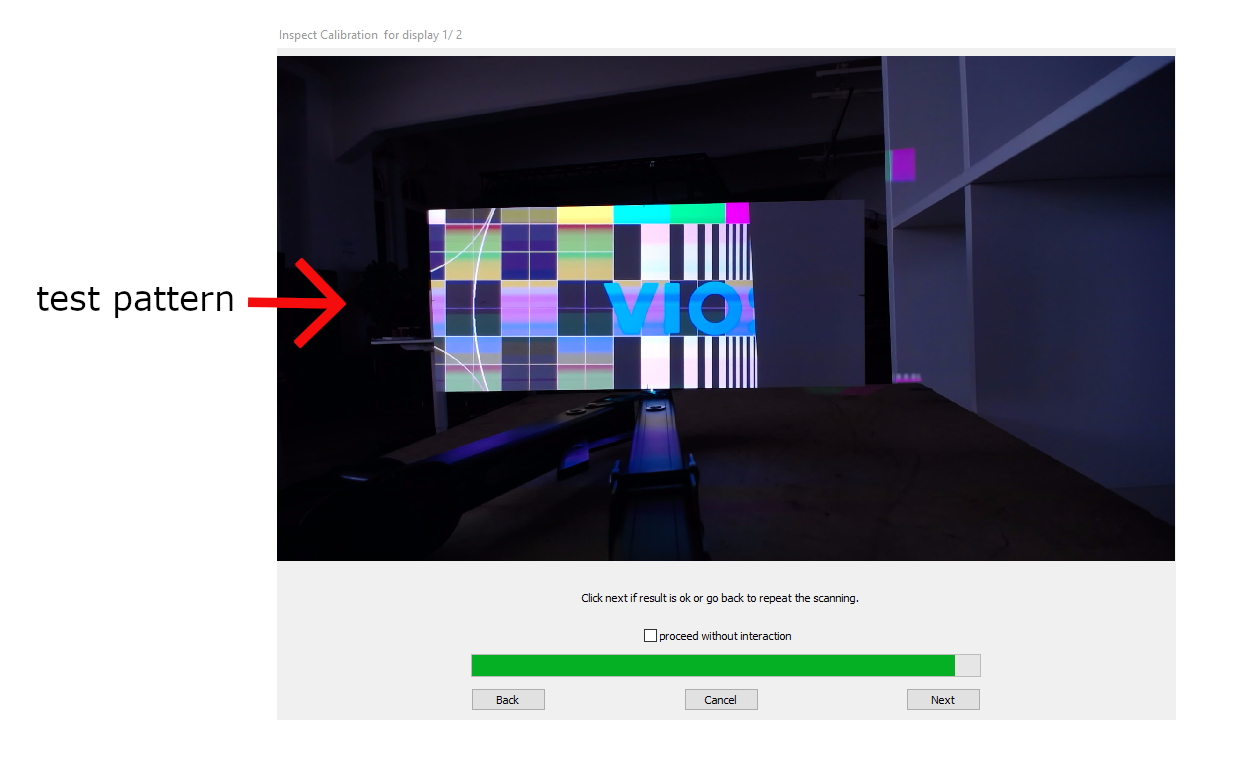
As soon as you click “Next”, a final result is displayed incorporating changes made during the geometry scan adjustment.
On this window you will see the result of the calibration for the current projector. You will see the VIOSO test image or your custom-set testpattern on the projection (only on the projector you are currently calibrating).

After the calibration of a projector, the preview will pause and show the result of the scan. If there are errors in the displayed image, simply click ‘Back’ to adjust the parameters and optimize them for the next scan.

The next step will switch to the next projector and start the scanning procedure again.
- Proceed without interaction (check box)
If checked, the system will use the parameters from the current scan on all projectors. The calibrator will not pause after the calibration of each projector and will perform all subsequent scans without the need of human interaction.
This method is only recommended for symmetrical screens with similar ambient conditions.
If unchecked, you will repeat the scan process for each projector.
Once you are satisfied with the result, click ‘Next’ to proceed with the next projector.
Click here to proceed to the next section.