
Table of Contents
Adjustment options
See here how to inspect the scan results in more detail:
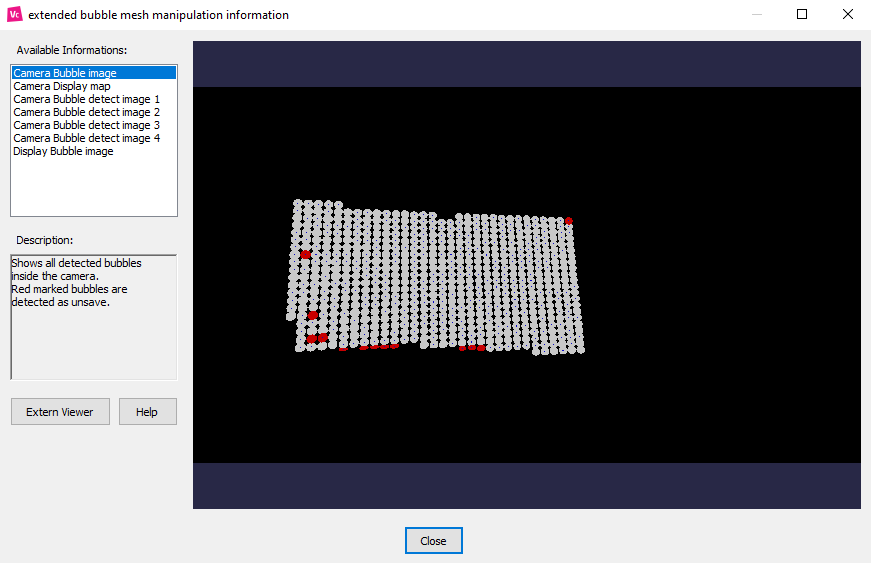
To see more information on your scan result, click ‘Show info’.
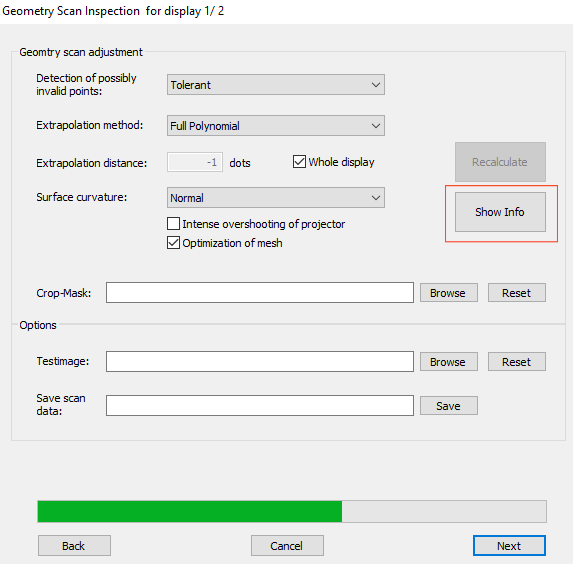
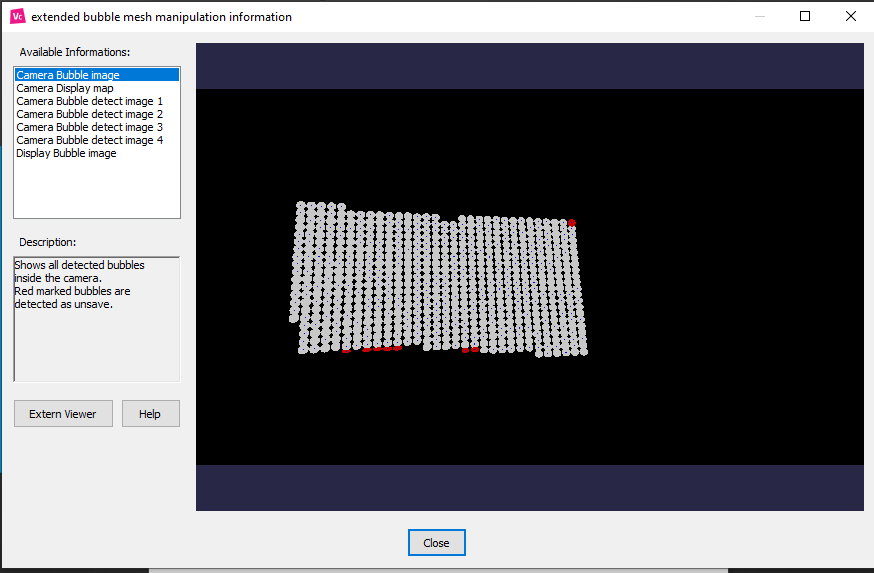
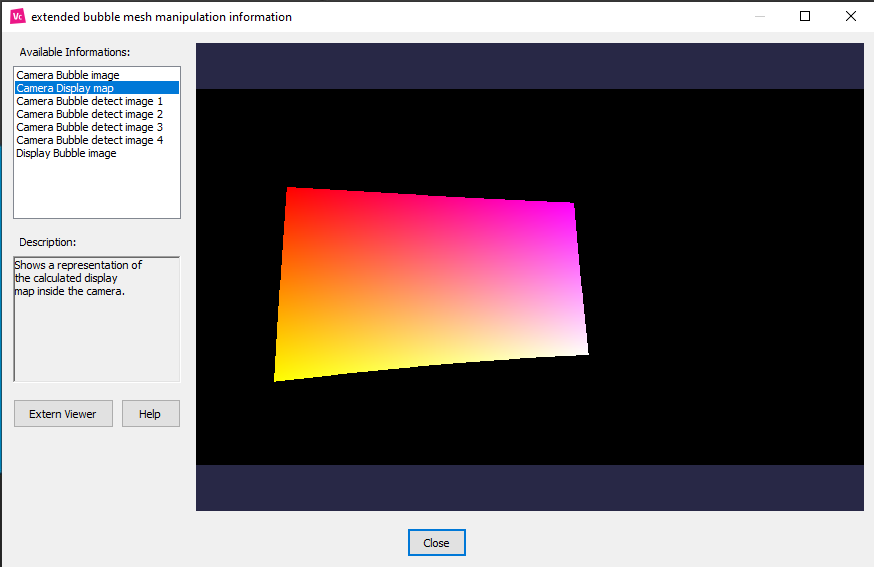
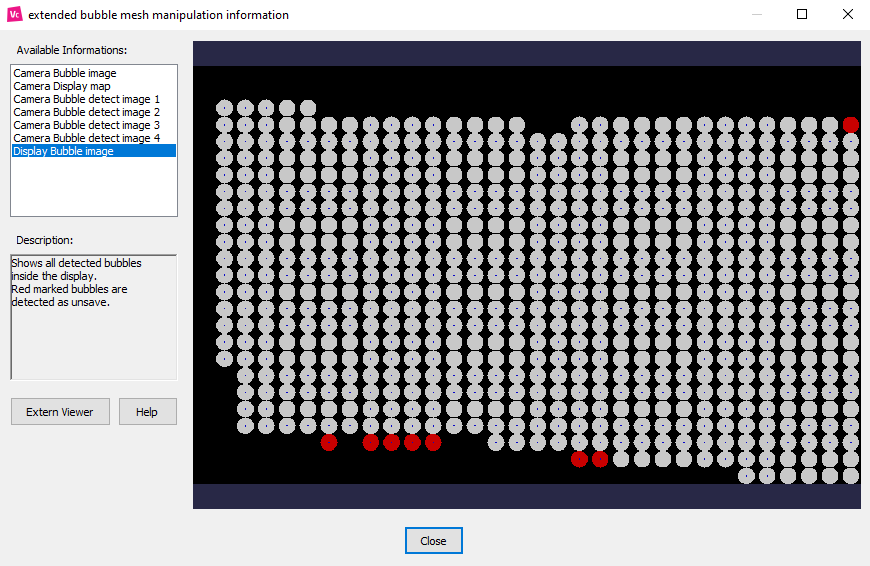
A window with the available information on your calibration will appear.
Go through the available information menu to see a graphic representation of the data collected during the scan.
If you change something, press ‘Recalibrate’ and check on screen.
Click ‘Close’ to go back to the Post-scan inspector.
Detection of possible invalid points
By changing these settings, you can make the system more or less tolerant to imperfections on your projection surface. This depends on your surface and the ambient condition of your setup.

A “Tolerant” detection setting will be more forgiving and extrapolate missing information dots, while a strict setting will mark these dots as unsaved data spots.
Difference between a “Tolerant” detection and a “Strict” one on the same scan:
To apply a change in settings, click the ‘Recalculate’ button and look at the projection result.
Extrapolation method
- Full polynomial- It takes the item as whole, not disrupted, provides the best visuals, and is most correct. Select “Full Polynomial”(standard extrapolation method/preferred) if all points are on a simple geometry, like sphere or cylinder.
- Partial polynomial- Segments the item into several parts. This mode works for disrupted surfaces. Select “Partial Polynomial” (alternative extrapolation method/use geometry does not match in overlaps –adds unwanted waviness on corners) for arbitrary shapes (but still the shape needs to be continuous (no corners)).
To apply a change in settings, click the ‘Recalculate’ button and look at the projection result.
Extrapolation distance
- Whole display (check box)- Uncheck if you wish to change the extrapolation distance and add the desired dot value.
- Number of points that must be extrapolated (-1 = whole display). Check if needed area is covered by projection.
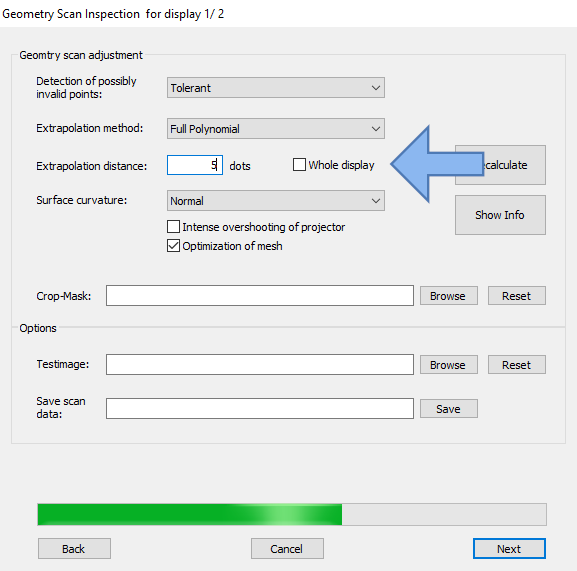
To apply a change in settings, click the ‘Recalculate’ button and look at the projection result.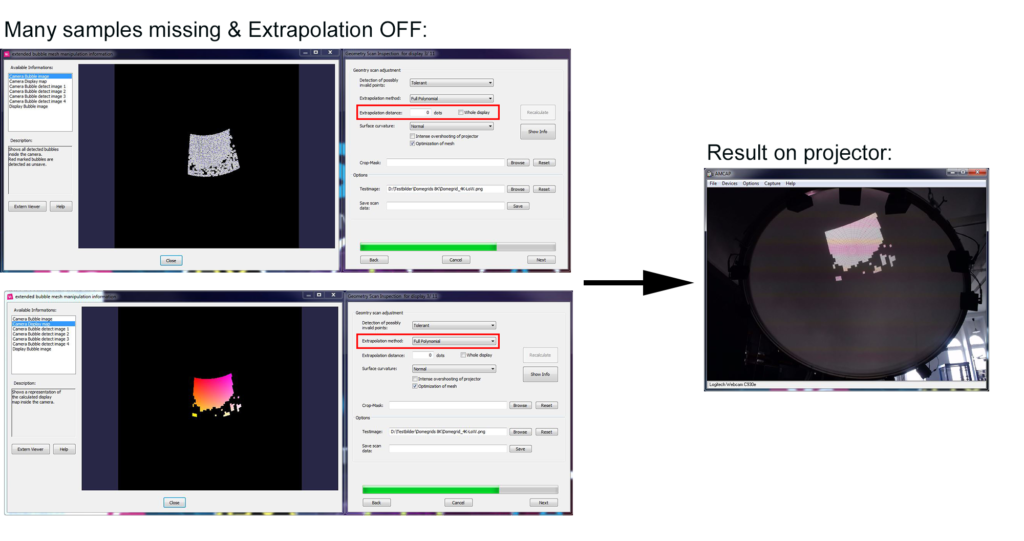
=> In such a case, increase the extrapolation distance incrementally until a sufficient coverage of the projector is achieved. Setting the mark on “whole” display will extrapolate all projector pixels – required if projectors do not have any overshooting.
Surface curvature
To improve your scan results, select the curvature of your screen: Slight, Normal, or Strong.
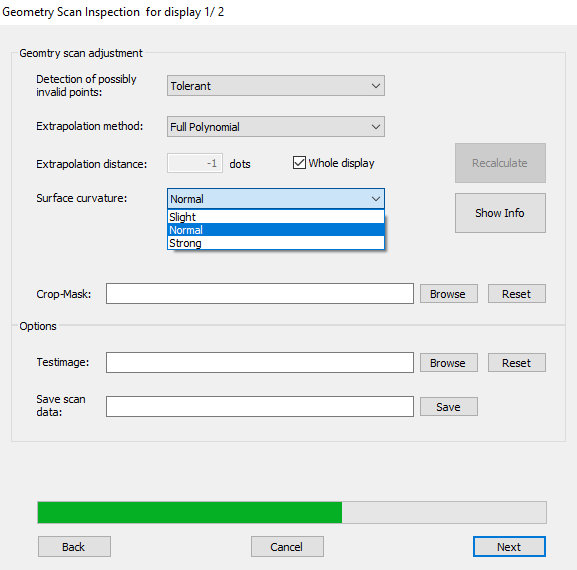
- Intense overshooting of projector (check box)- Check if a big part of the projection is not displayed on the screen.
- Optimization of mesh (check box)- Check if the shape does not match the real screen or projection surface.
- Crop mask- You can use cropping masks to cut parts of the projectors and change blending zones.
To apply a change in settings, click the ‘Recalculate’ button and look at the projection result.
Options
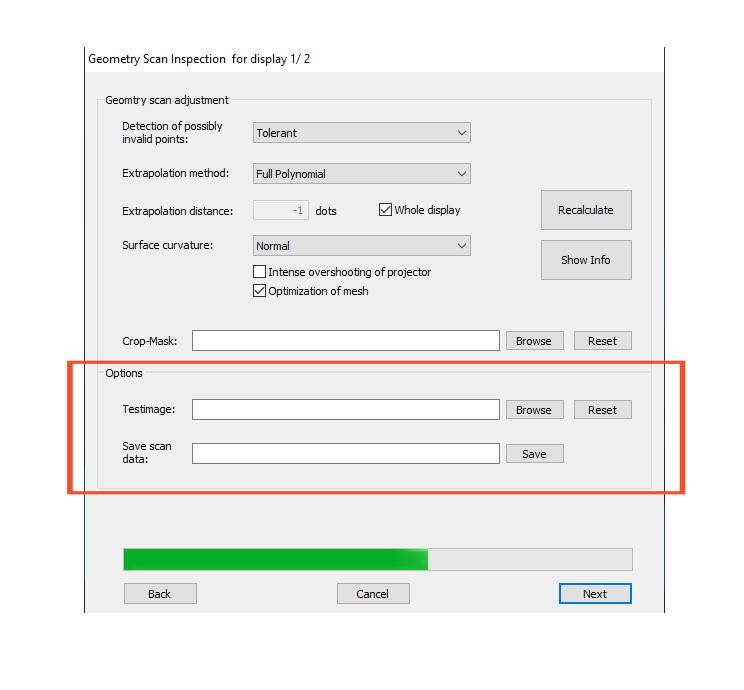
- Test image- Load a test image from your disk and use it to have a better visual feedback for the current projection. Recommended e.g. to identify missing parts.
- Save scan data- Save the current scan information as “*.BDI” file on disk. This “BDI-File” is used to skip a scan (“Load geometric scan” at the start of a calibration procedure).
Click ‘Next’ to exit this dialog.