Before doing any calibration, it is important to have a test pattern that fits to the aspect ratio and geometry of the screen.
Follow these steps to to create an appropriate test pattern. Testpatterns are used in numerous subsequent steps during the calibration process.
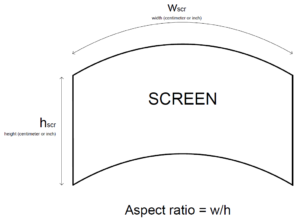
Step 1- Determine the screen dimensions and aspect ratio.
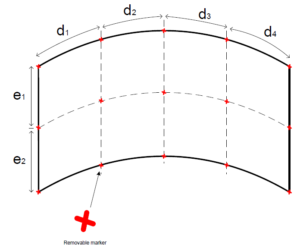
Step 2- Make sure your projectors overlap equally for an optimal calibration result. Then put removable markers on the screen. Make markers the same size horizontally and vertically.
d1 = d2 = d3 = d4 …
e1 = e2 …
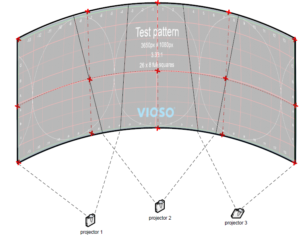
Step 3- Create a test pattern using our free online tool:
Free Online Testpattern Generator
(www.testpatterngenerator.com)
For a step-by-step guide refer to the knowledge base: Make a test pattern.
Step 4- Run the projector calibration. While adjusting the projector alignment, match the testing pattern with the markers on the screen. This ensures a geometrically correct mapping, which is mandatory for smooth movements and correct image display.