
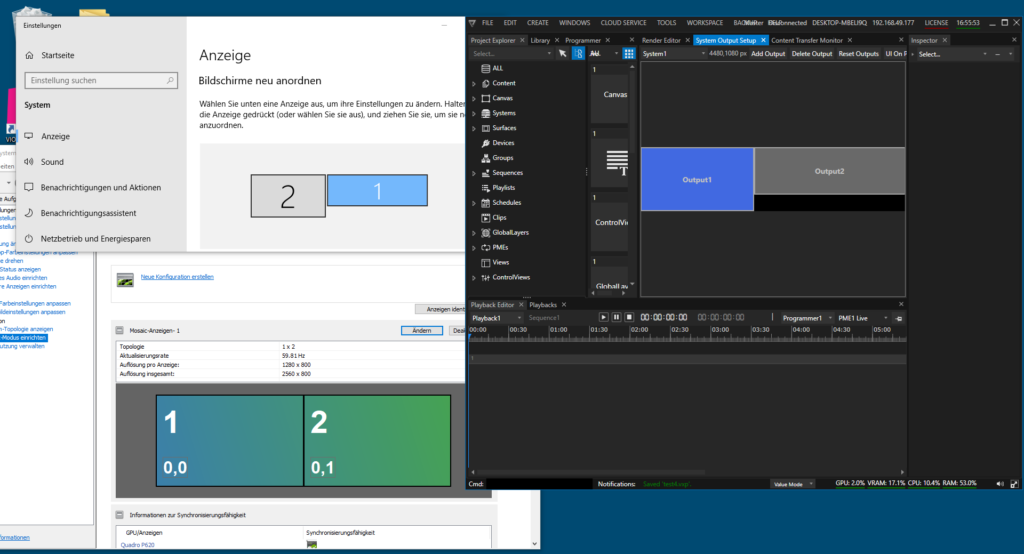
For this introductionary guide, we use a most simple but yet telling setup: A single PC which has two projectors connected and configured as Mosaic, and an additional operator’s monitor where the Vertex UI runs on. Windows therefore detects two displays, and so does Vertex at startup, whereas NVIDIA Mosaic settings reveal that the secondary display is splitted in two projection displays:
Configuration of Vertex Project
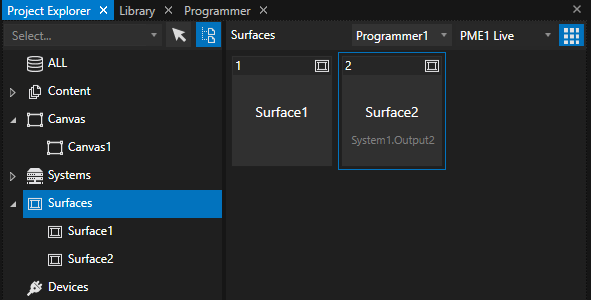
We start by creating a new project. Vertex adds a canvas and two outputs matching to the display configuration as it is seen by Windows. We start tagging the operator’s monitor as UI output in Vertex:

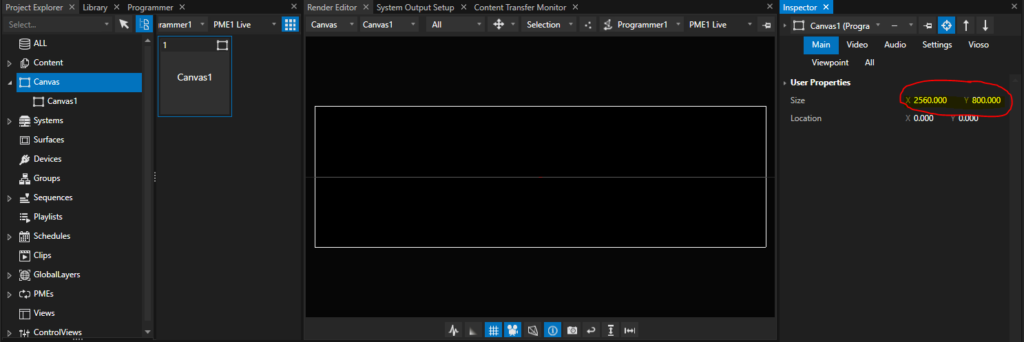
After that, remove all surfaces, since they are referring to the display resolution of the UI monitor. Right-click and select “Delete”:
We have now an empty Canvas. The initial resolution also does not fit, so we should to the expected output resolution. However, this step is optional, since after the calibration, all pixels are re-fitted automatically.
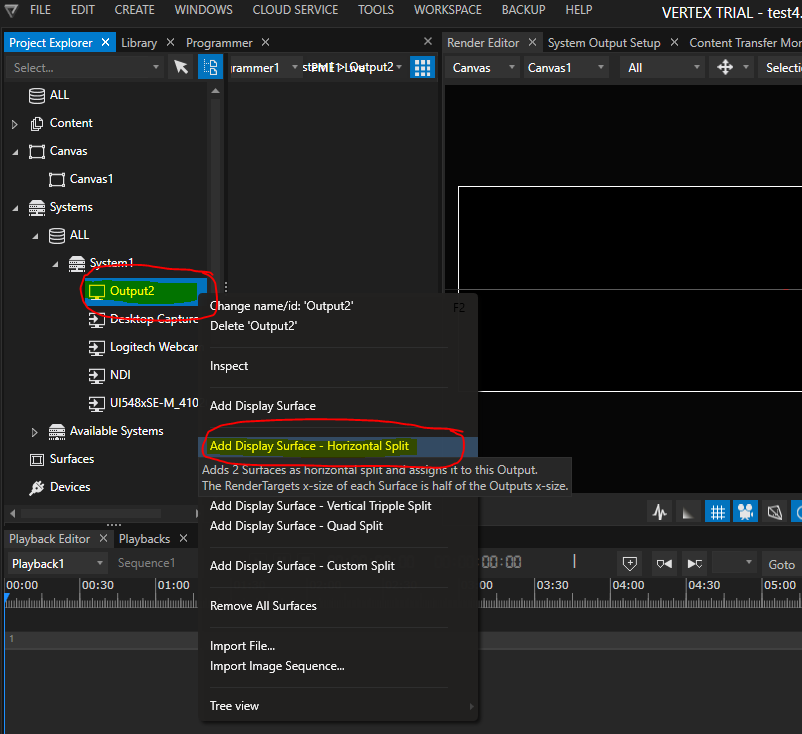
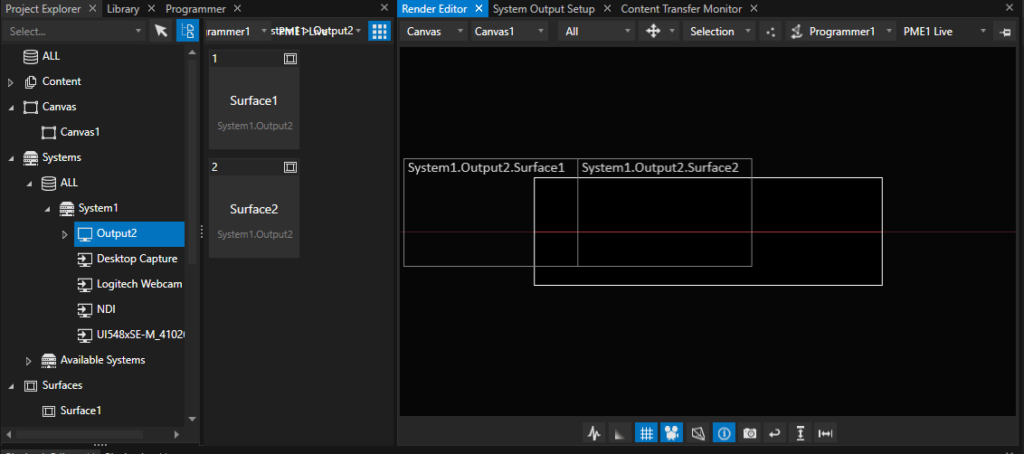
Now it’s time to bring back the surfaces. We need one surface per projector. In a Mosaic-setting like this, the easiest way is to add the Display Surface according to the Mosaic topology. Right-click on the Output that represents the Mosaic group and choose “Add Display Surface – Horizontal Split”:
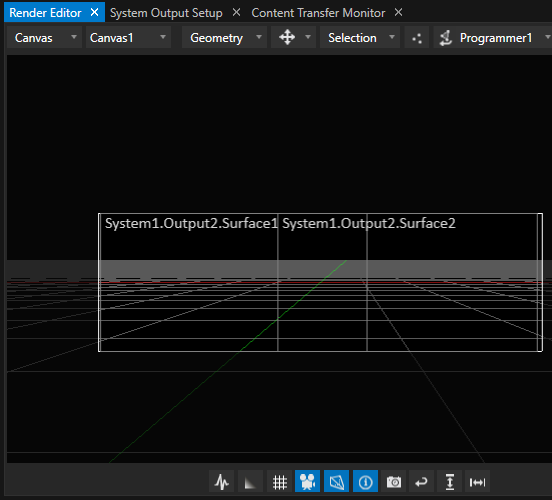
After creation of two surfaces, simply drag & drop both surfaces on the canvas. There is no need to take special care about the surface placement and orientation – such values are set automatically once the calibration is done:
With this action, the configuration of the Vertex project is done and ready to save before starting the calibration wizard.
Calibration Procedure (camera based)
Vertex comes with an integrated autoalignment module, so most configurations and settings are done on-the-fly. Please check that the camera you are using is supported and properly configured. Learn here more about this topic: VIOSO camera setup.
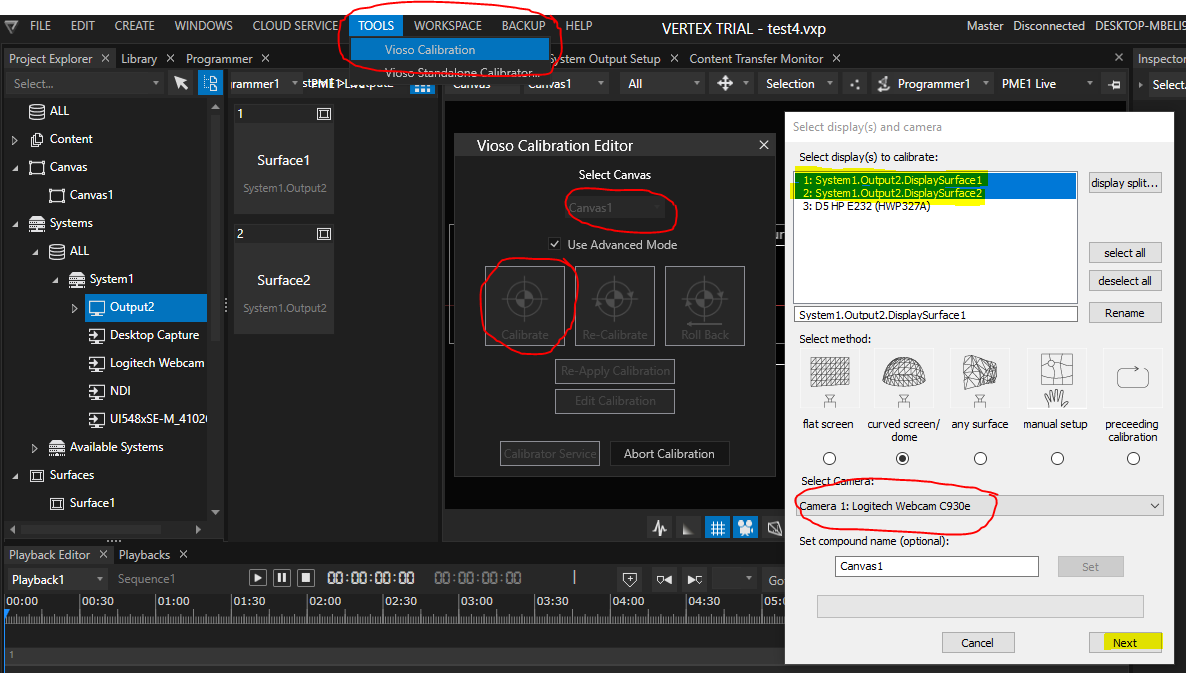
The calibration procedure is initiated by accessing “Tools – Vioso Calibration”. A calibration is based on the Canvas, so in case of multiple screens, multiple calibrations can be handled. After launching the AutoCal module, it displays the calibration configuration dialog, where the displays to calibrate are already selected. Don’t make any change on that:
For an exhaustive explanation of the calibration parameters as well as how to handle the camera, masking and extrapolation, please refer to the documentation of VIOSO Core:
Within Vertex, the calibration workflow is exactly the same:
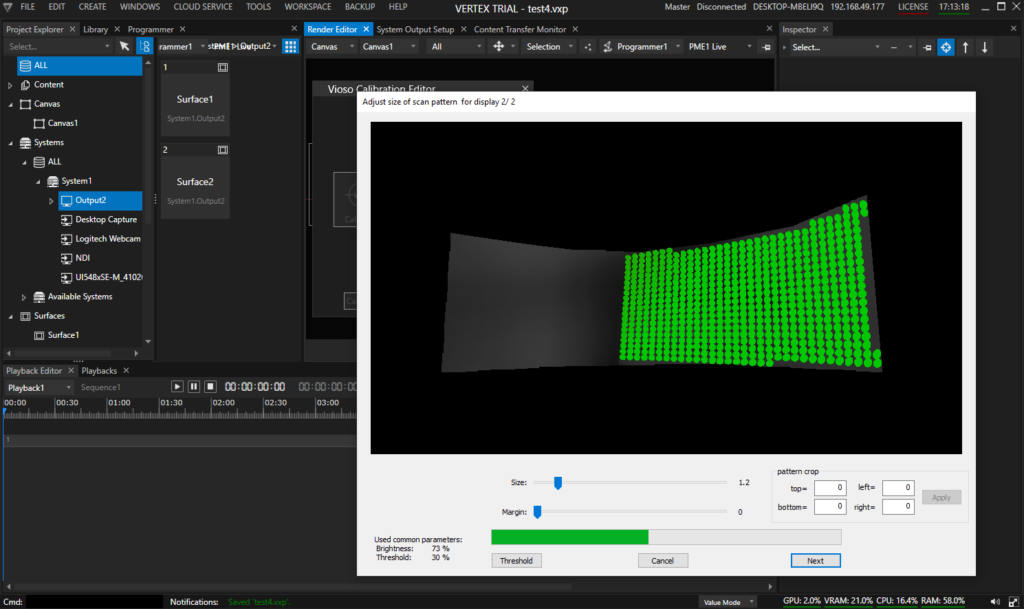
After scanning both projectors, the overlap and blend is calculated automatically. The final step of the calibration then is a manual warping of content to screen. At this point, there is no way to change the testpattern, so make just a very rough warp. Finetuning of this alignment is done in a later step.

After the alignment is done, check the resulting pixel space. Based on the overlap and the current warp, the AutoCal module calculates the effective visible pixel space of the content, that is acually displayed on the projectors, and also gives an estimation of the ideal aspect ratio the content should have. To access this analysis, click the button “ext. content info”:
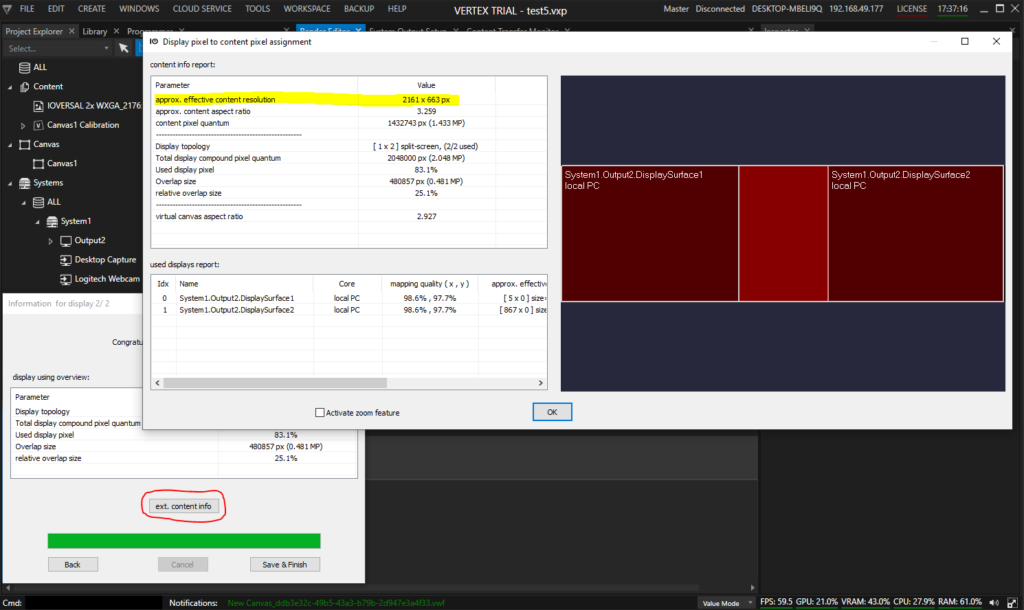
It is advised to note these values (“approx. effective content resolution” and “aprox. content aspect ratio”) and double check against a suitable testing pattern or customer content. We show this in a later step.
To finalize the calibration, return to the calibration dialog and click “Save & Finish”. The calibration is saved and transferred to Vertex, where now the positions and view ports for each display surface is updated accordingly.
Vertex now should display the aligned, blended and warped output on the projectors.
Troubleshooting
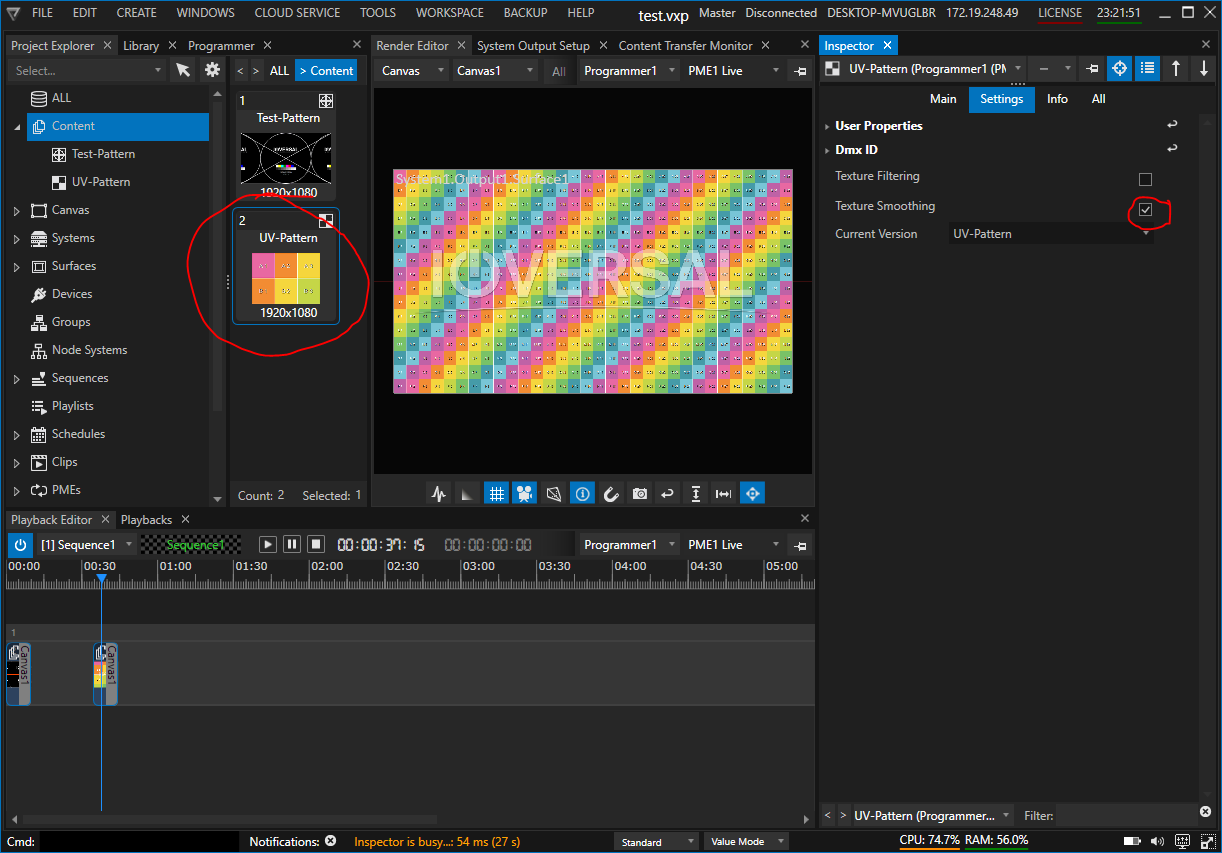
Depending on the resolution of the content and the outputs, unsightly artefacts may occur after applying the calibration.
In this case, “Texture Smoothing” must be activated for each content (images, videos, live input, etc.).
Select the content in the project explorer, then change to the “Settings Tab” in the Inspector and activate the “Texture Smoothing” checkbox.
- Continue to Edit, Optimize and Recalibrate