• Home
  • Knowledge Base
    • Licensing
    • Operation
    • Quality Improvement
    • References
  • Documentation
    • VIOSO Core 5
    • VIOSO Anyblend 5
    • VIOSO Anyblend VR&SIM 5
    • VIOSO Integrate 5
    • VIOSO Player 2
  • FAQ
    • Error and other feedback
    • Licensing
    • System & Requirements
  • Videos
  • Home
  • Knowledge Base
    • Licensing
    • Operation
    • Quality Improvement
    • References
  • Documentation
    • VIOSO Core 5
    • VIOSO Anyblend 5
    • VIOSO Anyblend VR&SIM 5
    • VIOSO Integrate 5
    • VIOSO Player 2
  • FAQ
    • Error and other feedback
    • Licensing
    • System & Requirements
  • Videos

VIOSO Integrate 5

home/Documentation/VIOSO Integrate 5
Expand All Collapse All
  • VIOSO Integrate Overview
  • VIOSO Integrate VS Integrate Plus
  • Media Playback Solutions
    • AV Stumpfl Pixera
      • Running Pixera Autocal standalone
      • UV-Mapping and 3D calibration
      • Multi-client setups
    • Vertex VIOSO & IOVERSAL Vertex
      • AutoCal Single Camera: Getting started
      • Modifying, Optimizing and Recalibration
      • Using Autocal Standalone
  • Dome- and Planetarium Solutions
  • 3D Engines
    • Unity Plugin
    • Unreal Engine Integration
      • Examples: UE4.24-.26
      • Examples: UE4.27 & UE5
    • MiddleVR Integration
    • Techviz
  • Simulators
    • SILAB
    • Quantum 3D: Mantis
    • AVSimulation: SCANeR Studio
    • rFpro
    • Prepar3D
    • X-Plane 11
  • Projector Integration
    • Barco Pulse Export
    • Norxe Export
  • VIOSO WarpBlend API
    • API usage on Windows
    • API usage on Linux
    • Implementation Remarks
    • VIOSOWarpBlend.ini Reference
    • API Examples
      • Example 1 - Simulator with moving platform
      • Example 2 - Another simulator with moving platform
      • Example 3 – Cave
      • Example 4 – Video player

Modifying, Optimizing and Recalibration

579 views 0

Emanuel
February 17, 2021

This chapter covers the features to edit the result, optimize warping and blending as well as realign projectors with a single click.

Custom testpattern

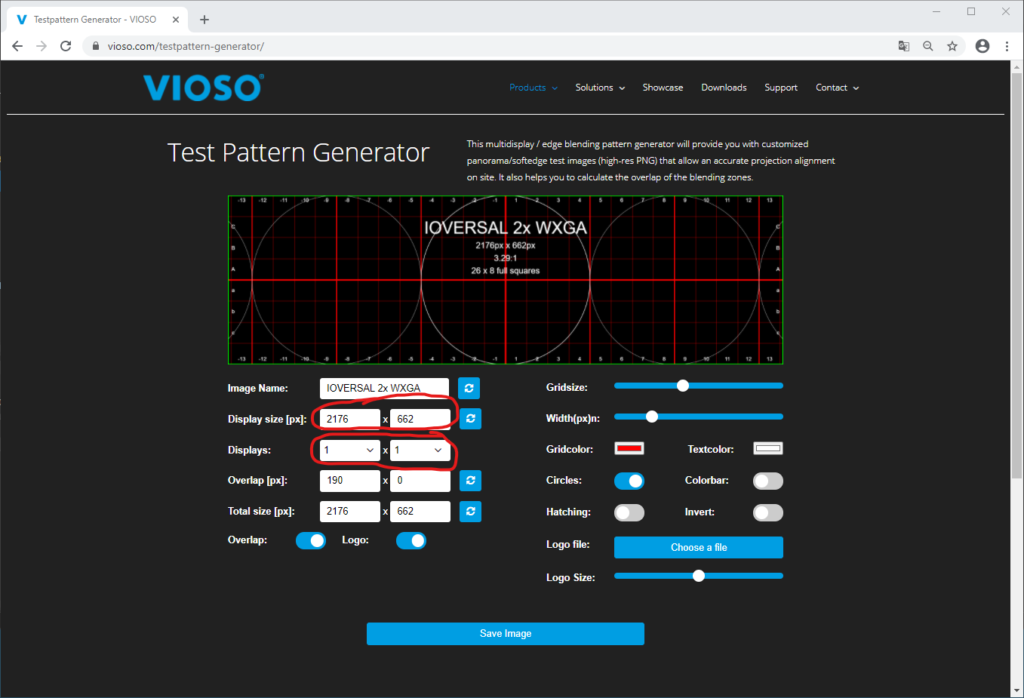
Now it’s time to think about the content. There should be at least one testing pattern, that fits to the screen dimensions and therefore acts as a reference for proper alignment and content distribution. If no testing pattern exists, we recommend to create one using the free Online Testpattern Generator: Testpatterngenerator.com.

Use a 1×1 display configuration and enter the “approx. effective content resolution” that have been reported in the calibration before:

Download/Save and import the testpattern to Vertex and place it on the canvas:

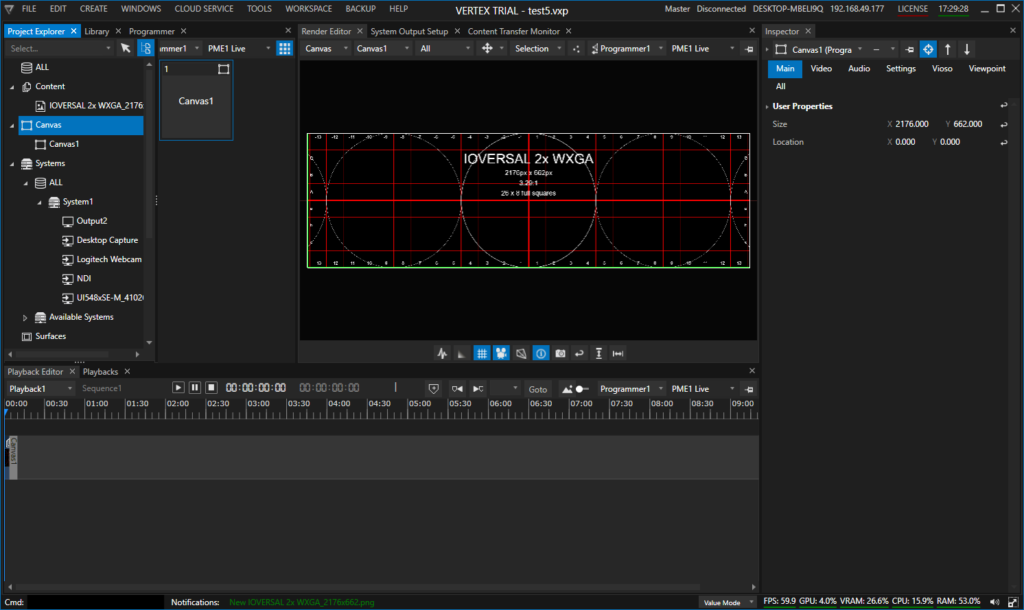
Use the “Scate to Fit” feature, available on right-clicking on the clip in the timeline to make the testpattern fit exactly to the dimensions of the canvas. This is important for editing the calibration:

Edit the calibration

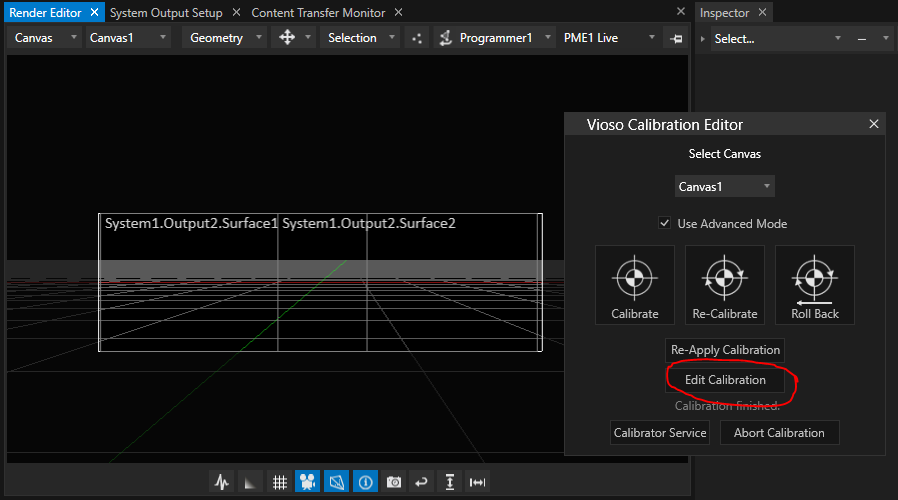
There are numerous means to finetune and optimize the calibrated result. For this, AutoCal is launched again from within Vertex in the “Edit mode”:

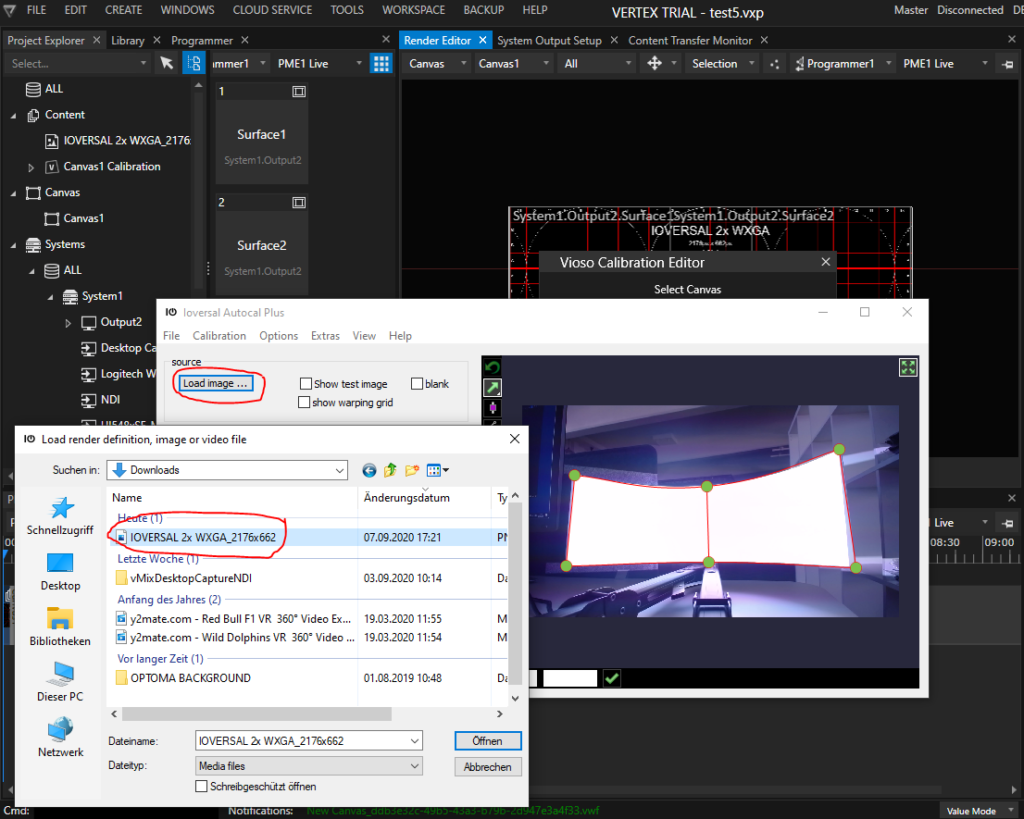
Launched this way, AutoCal provides much more features compared to what is exposed during the calibration procedure. AutoCal always starts with a built-in testing pattern, but you might need different contents to estimate e.g. the mapping preciseness or optimize the blending. To change the displayed image, click the button “Load Image” and choose appropriate content from the local drive. Most usual image formats are supported:

Now it is time to optimize the result. Learn more here:

  • Editing of color and blending: Blend and projector adjustment
  • Handling the warping tool: Warping and mapping explained
  • General quality considerations: Optimizing blending quality

Once the result is fine-tuned, return to Vertex clicking the “Stop”-Button. All work again is saved and transferred to Vertex:

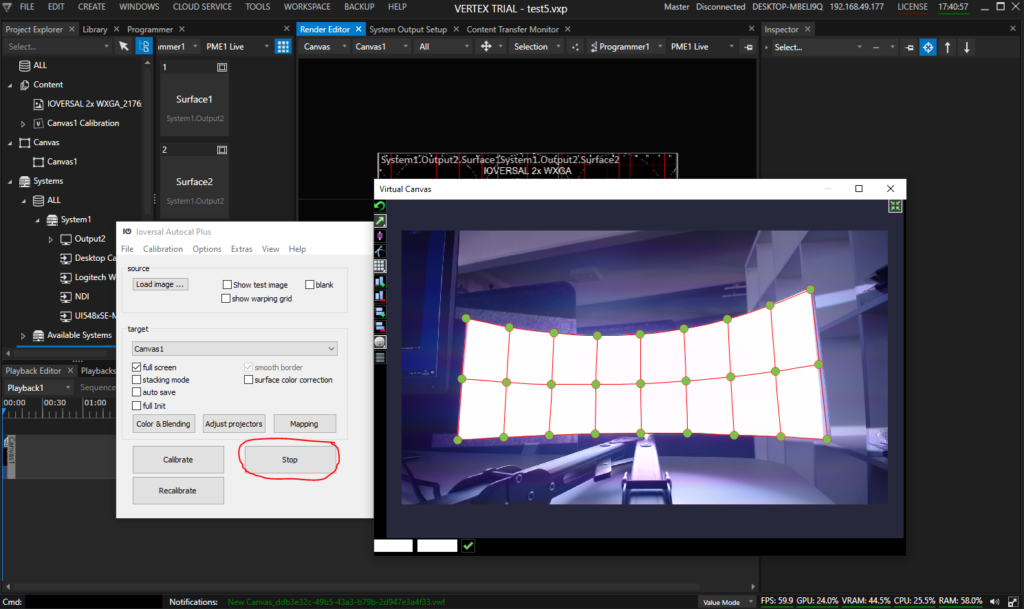
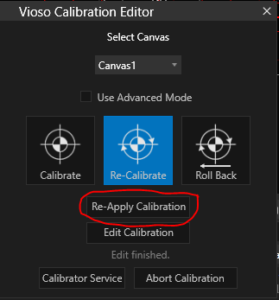
The output on the projectors might not be adjusted immediately. In this case, click “Re-Apply Calibration”:

Automatic Realignment

Vertex AutoCal can do a 100% automated realignment of projectors. The precondition is, that the camera does not move at all or change or loose it’s settings since the initial installation. Therefore we strongly recommend to go with professional computer vision cameras or otherwise automatable and managable cameras. Contact us in case of any question regarding camera selection.

Once an initial calibration is done and assuming the camera is configured appropriate and has not moved, all it takes is to launch the recalibration procedure from the Vioso Calibration Editor:

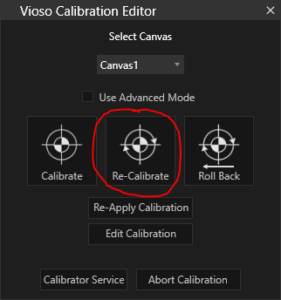
The recalibration immediately launches the scanning procedure that runs through all projectors. Once done, the result is computed, transferred to Vertex and instantly applied.

If for some reason the result is not satisfying, the previous calibration can be loaded by clicking “Roll Back”.


Was this helpful?

Yes  1 No
Related Articles
  • Barco Pulse Export
  • Examples: UE4.24-.26
  • SILAB
  • Quantum 3D: Mantis
  • VIOSO Integrate Overview
  • Norxe Export

Didn't find your answer? Contact Us

Previous
AutoCal Single Camera: Getting started
Next
Using Autocal Standalone
  • Ticket System
  • VIOSO Home
  • Imprint
  • © 2020-now VIOSO GmbH. All Rights Reserved.

We use cookies on our website to give you the most relevant experience by remembering your preferences and repeat visits. By clicking “Accept”, you consent to the use of ALL the cookies.
Do not sell my personal information.
Cookie settingsACCEPT
Manage consent

Privacy Overview

This website uses cookies to improve your experience while you navigate through the website. Out of these, the cookies that are categorized as necessary are stored on your browser as they are essential for the working of basic functionalities of the website. We also use third-party cookies that help us analyze and understand how you use this website. These cookies will be stored in your browser only with your consent. You also have the option to opt-out of these cookies. But opting out of some of these cookies may affect your browsing experience.
Necessary
Always Enabled
Necessary cookies are absolutely essential for the website to function properly. This category only includes cookies that ensures basic functionalities and security features of the website. These cookies do not store any personal information.
Non-necessary
Any cookies that may not be particularly necessary for the website to function and is used specifically to collect user personal data via analytics, ads, other embedded contents are termed as non-necessary cookies. It is mandatory to procure user consent prior to running these cookies on your website.
SAVE & ACCEPT