
In this article, we describe the steps to acquire virtual camera poses relative to each projector (Fields of View and Orientations) from a 3D calibration performed in Anyblend VR&SIM (or Integrate Plus).
This workflow is needed only for static eye-point integrations to simulators and rendering engines where it is necessary to manually configure camera parameters for each view. For dynamic eye-point plugins this automatically executed by the API.
The general idea is to convert the single view generated by the calibration into multiple blended views then configure your rendering application with the corresponding camera poses. This is described in details below:
Table of Contents
1. Perform a 3D calibration
Since calculating virtual camera poses relies on 3D coordinates in the content space, the calibration scan must be followed by 3D alignment of the projection screen. This gives us the data necessary to automatically calculate a frustum for each a projector space.
2. Apply an Auto-Frustum Conversion
In this step, the software will automatically calculate poses and create a content space for each projector:
- First, Make sure that no warping is applied to the grid and that your canvas is in full screen.
- From the main menu, go to Calibration > Conversion Tasks :
- Select your compound from the list of available calibrations
- Select “auto frustum” as a conversion format
- Specify the desired eye point coordinates for the viewer
- Click on Perform
- Check out the calculation results in Calibration > Content spaces : you should see in the list a new entry or each projector.
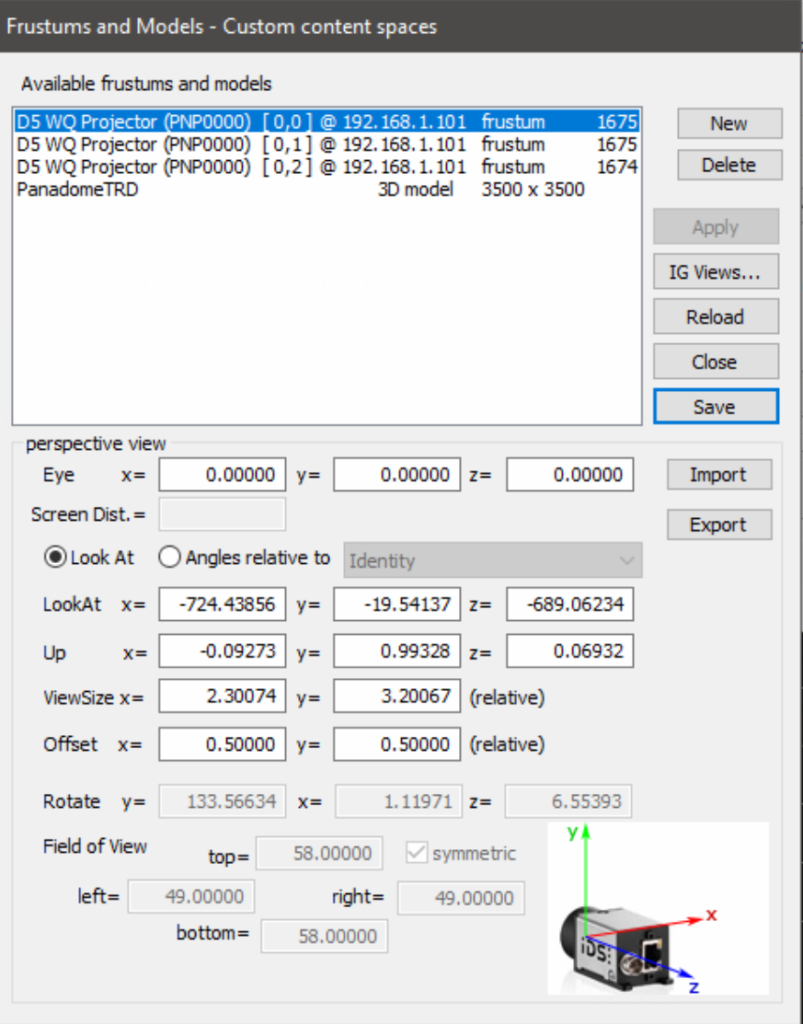
3. Adjust Frustum Values
- From the main menu, go to Calibration > Content Spaces :
- Create a new frustum by clicking on the “New” button, name it “main” and set its type to “frustum” and click on “Create Empty Defintion”
- Select the main frustum you just created and set its “LookAt” coordinates and and “Up” vector. Example: For a screen calibrated with a camera facing the screen at 1 meter distance, LookAt = (0,1000,-1000) and Up = (0,1,0)
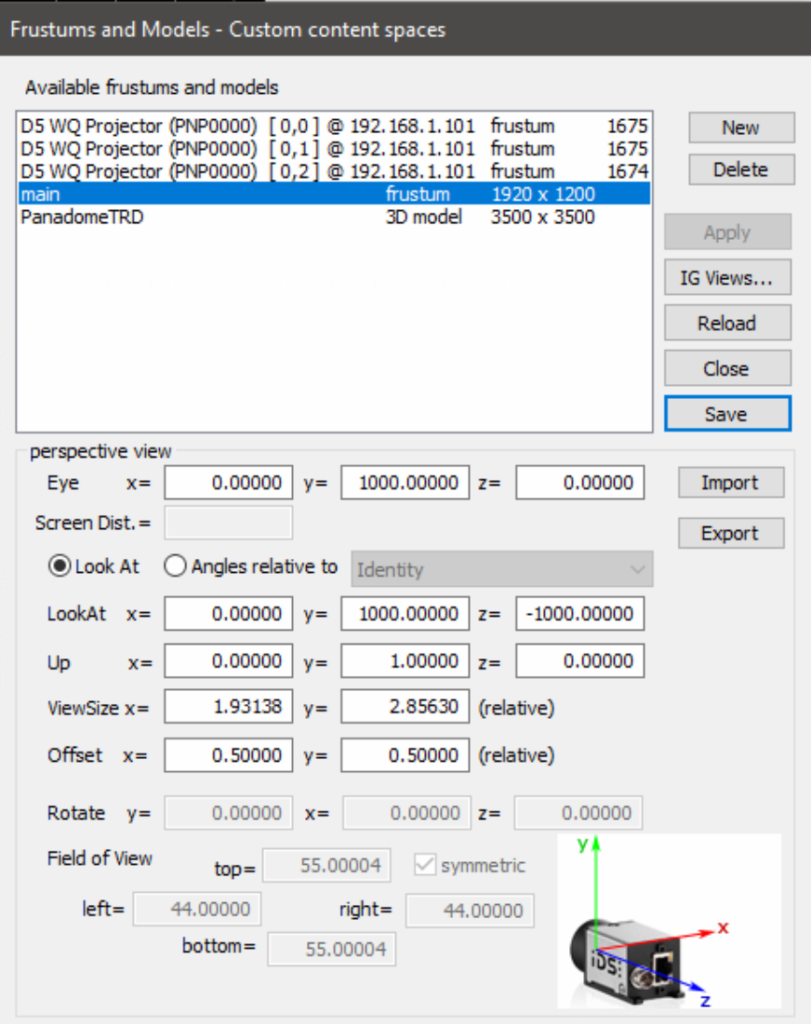
- Click on “Apply”.
- Select each of the Projector frustums from the list and edit its Rotation and Field of view values to round them to integers, for example : if Y=48.86 round it to Y=49
- Make sure you apply each edit, and finally click on Save to finish.
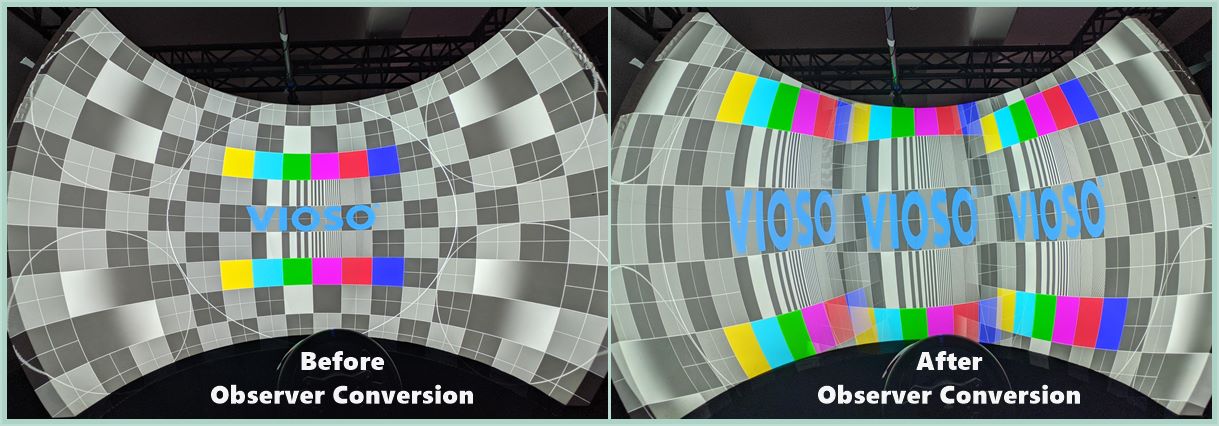
4. Apply Observer Conversions
- From the main menu, go to Calibration > Conversion Tasks :
- Select your compound from the list of available calibrations
- Select “Observer conversion” as a conversion format
- Select the first projector frustum from the list
- Click on Perform
- Repeat the same observer conversion steps for all projector frustums
- Save the calibration to a different file, you can call it for example “name_ObserverConv”
5. Check the result & Export
Finally, to check your conversions result you can activate the compound, show a test image and watch out for such issues:
-
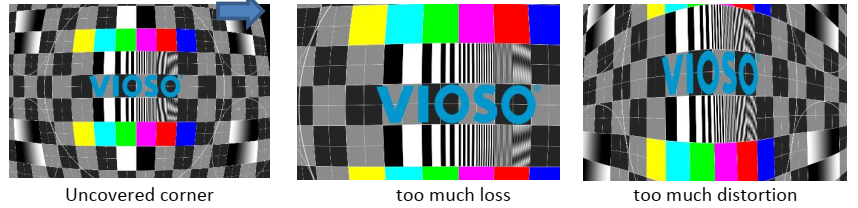 “Uncovered corners” and “too much loss” issues are due to viewport parameters being too narrow/wide. You can fix this by going back to your initial scan result and redo step 3. (Adjust Frustum Values): slightly edit the fields of view then re-convert and check.
 - “Too much distortion” means your projectors are too wide to produce non-distorted single views. This not fixable by software
Once you optimized your result and made sure the views are entirely covering the projection screen, proceed to export: File > Export Mapping then uncheck the 3D box.